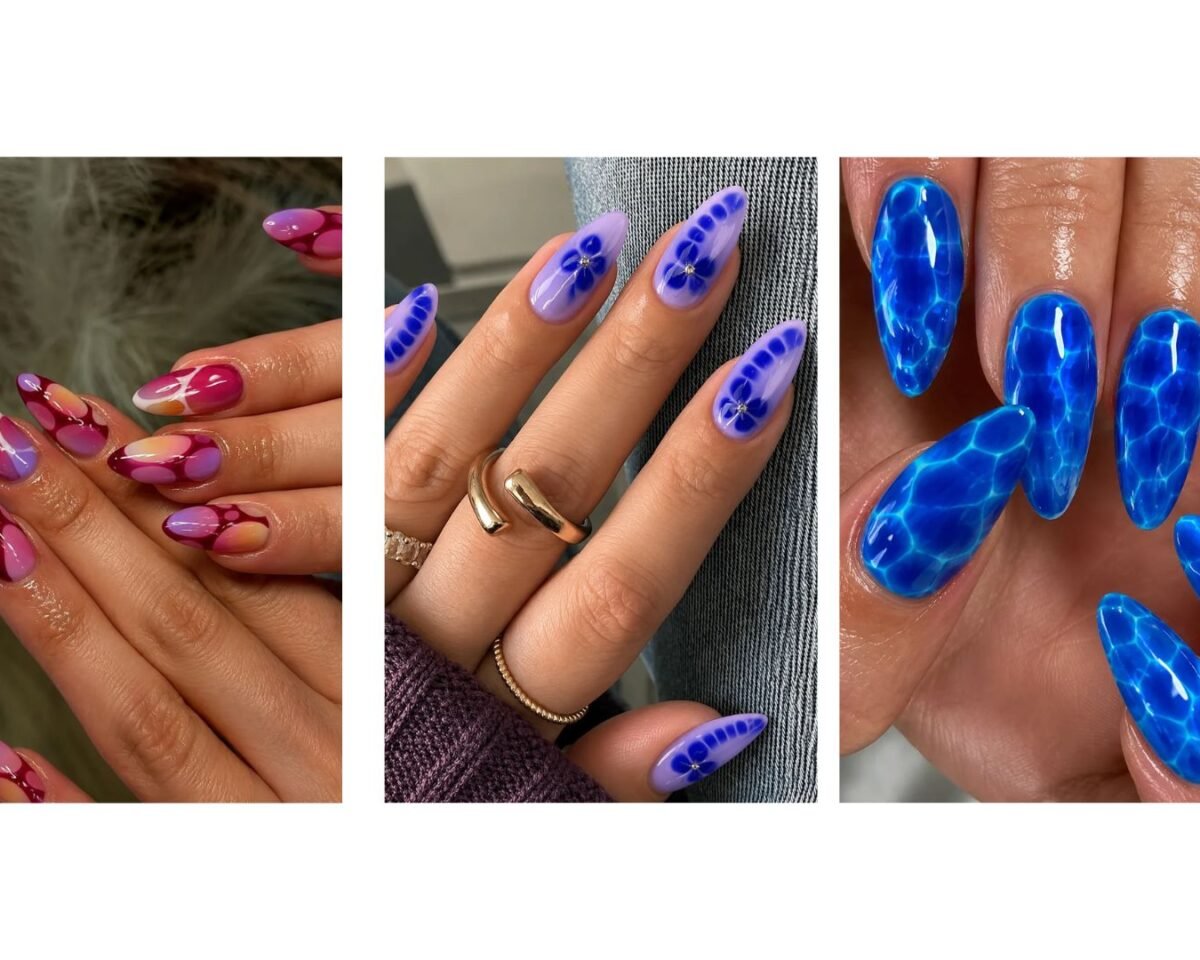
If you’ve been scrolling your FYP lately, chances are blooming gel nails have already stopped your thumb mid-swipe, and for very good reason. This gorgeous nail trend combines effortless artistry with a dreamy, watercolor-like finish that looks totally custom and impossibly chic. Whether you’re a seasoned nail enthusiast or just dipping your toes into gel nail art, these blooming gel nail ideas are about to become your new obsession.
Wait, What Even Are Blooming Gel Nails?
Think of blooming gel as a magic clear base that stays “wet” so you can play with it. When you drop color on top, it “blooms” (aka spreads out), creating those watercolor or crocodile textures you’ve seen all over your FYP. It’s the secret behind those viral looks that feel totally custom and high-end.
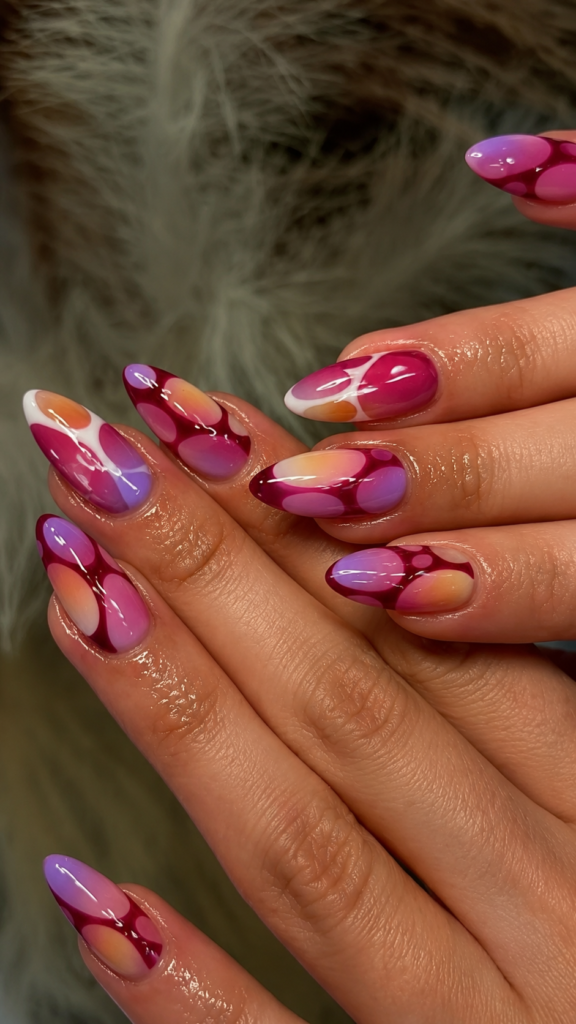
1. Sunset Dreamscape Blooming Gel Nails
This look is giving pure summer sunset energy. It’s a mix of deep magenta, orange, and purple hues that melt into each other on a sleek almond-shaped canvas. The vibe is super energetic and fluid, making it a total standout for anyone who wants their nails to be the main character.
- Style Insight: A total power move for anyone who loves high-contrast colors and a soft, blurred finish.
- Who it Suits: Bold personalities who want their nails to be the center of attention.
- When to Wear: Pack these for your next festival or vacay, they’re made for the sun.
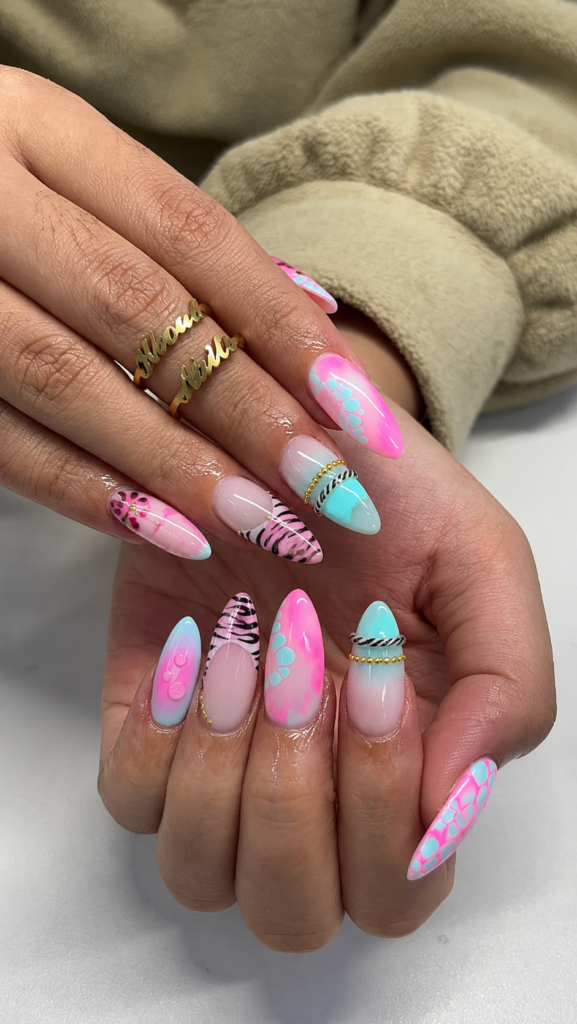
2. Pastel Abstract Fusion Blooming Gel Design
This design is a whimsical, avant-garde play on textures. It’s got pastel pinks, blues, and mint greens mixed with edgy black zebra stripes and gold accents. The mood is “maximalist” and creative, blending those soft blooming gradients with sharp, geometric details.
- Style Insight: Leverage the contrast between the “fuzzy” blooming base and the sharp line work for a unique look.
- Who it Suits: The creative trendsetter who isn’t afraid to mix patterns and textures.
- When to Wear: Perfect for casual hangouts or when you’re feeling your most creative.
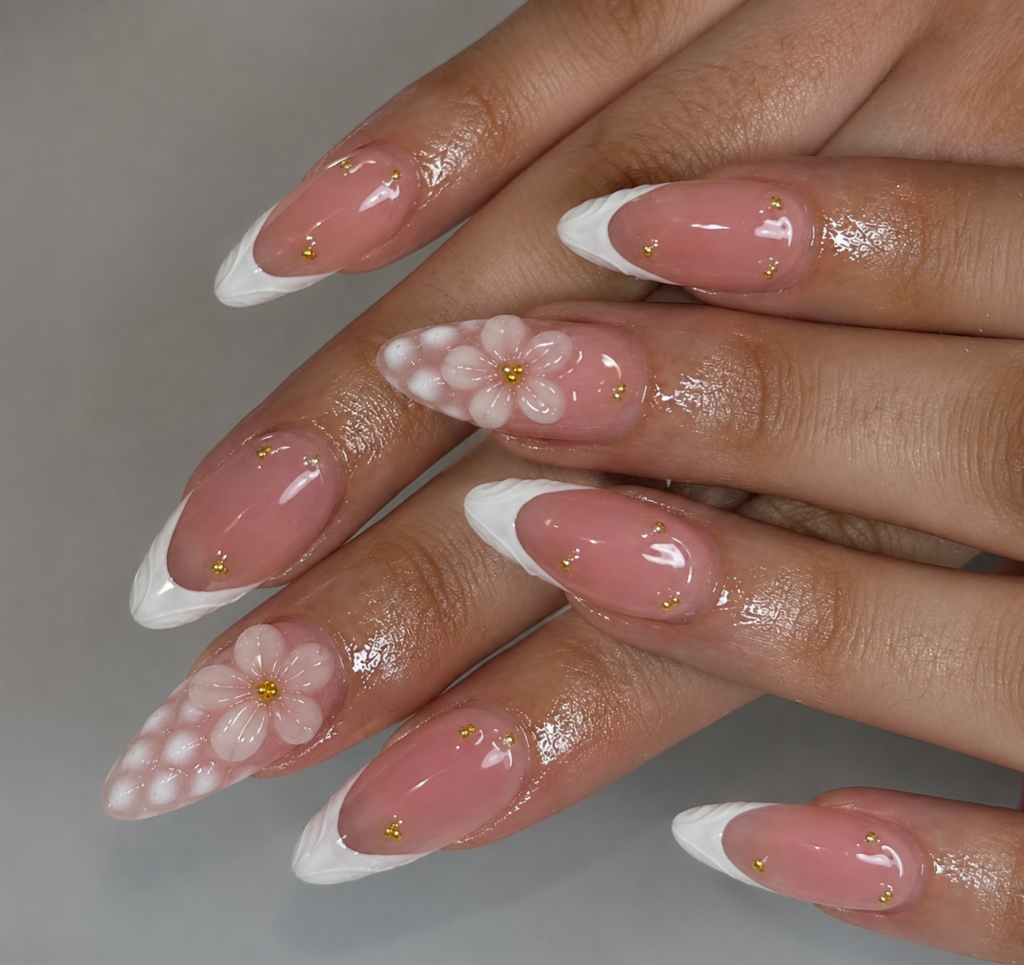
3. Pearl Blossom Elegance — Refined Blooming Gel Nail Art
For the “clean girl” aesthetic lovers who want a bit more spice. This set features 3D floral accents on a soft nude base, framed by textured white French tips and tiny gold studs. It’s refined, feminine, and feels incredibly polished.
- Style Insight: This is a standout result for a romantic, high-texture look that still feels sophisticated.
- Who it Suits: Anyone who loves a soft, “balletcore” or coquette vibe.
- When to Wear: Weddings, formal events, or when you just want to feel extra fancy.
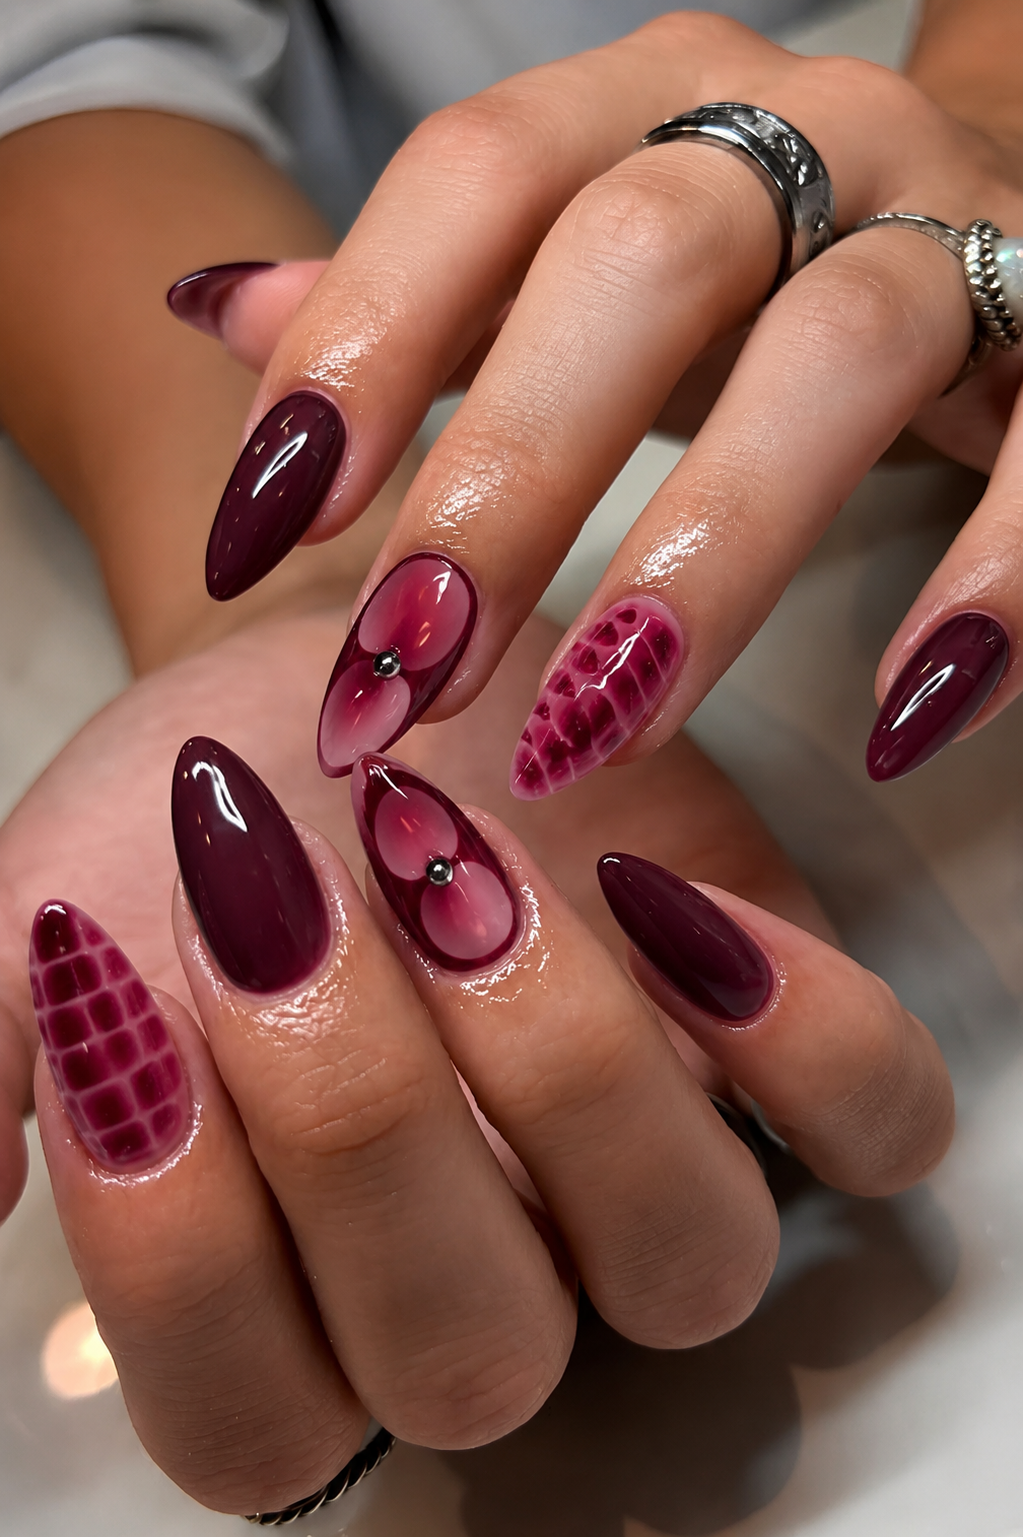
4. Gothic Rose & Croc Print — Moody Blooming Gel Nails
Deep burgundy and black tones come together for a look that’s moody and a little bit edgy. This set features a “crocodile skin” texture paired with a central blooming floral design. It’s giving major “dark academia” vibes.
- Style Insight: Synergize deep wine colors with organic textures for a look that is both powerful and mysterious.
- Who it Suits: Fans of grunge-glam or anyone in their “villain era.”
- When to Wear: Late-night dates, autumn parties, or winter holidays.
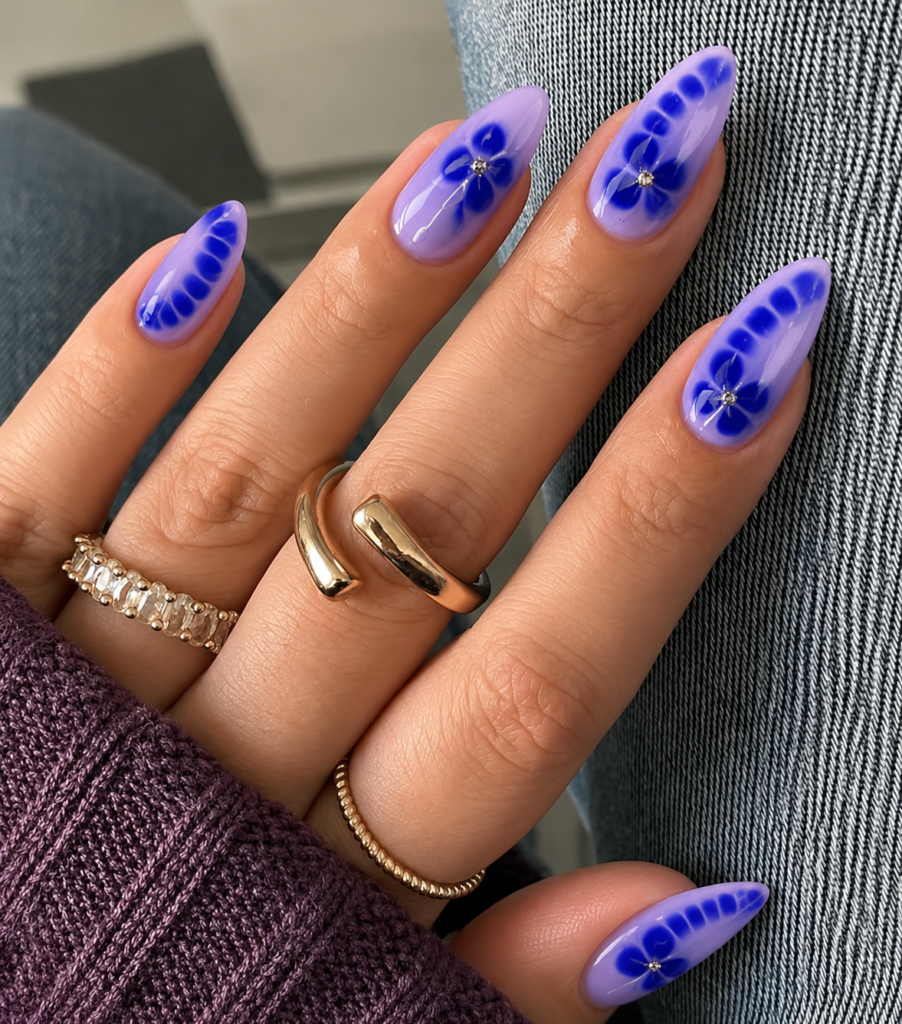
5. Electric Indigo Florals — Monochromatic Blooming Nail Art
This design proves you can do a lot with a monochromatic palette. Using different shades of indigo and violet, it creates a striking floral pattern with a “tie-dye” effect inside the petals. The mood is cool, contemporary, and super fresh.
- Style Insight: Use a bright blue base to make those deeper purple blooming details really pop.
- Who it Suits: Blue-lovers who want an artistic but wearable look.
- When to Wear: A great everyday vibe that works for school, work, or the weekend.
Would you like to find some specific product recommendations to help you recreate the “Electric Indigo Florals” look?
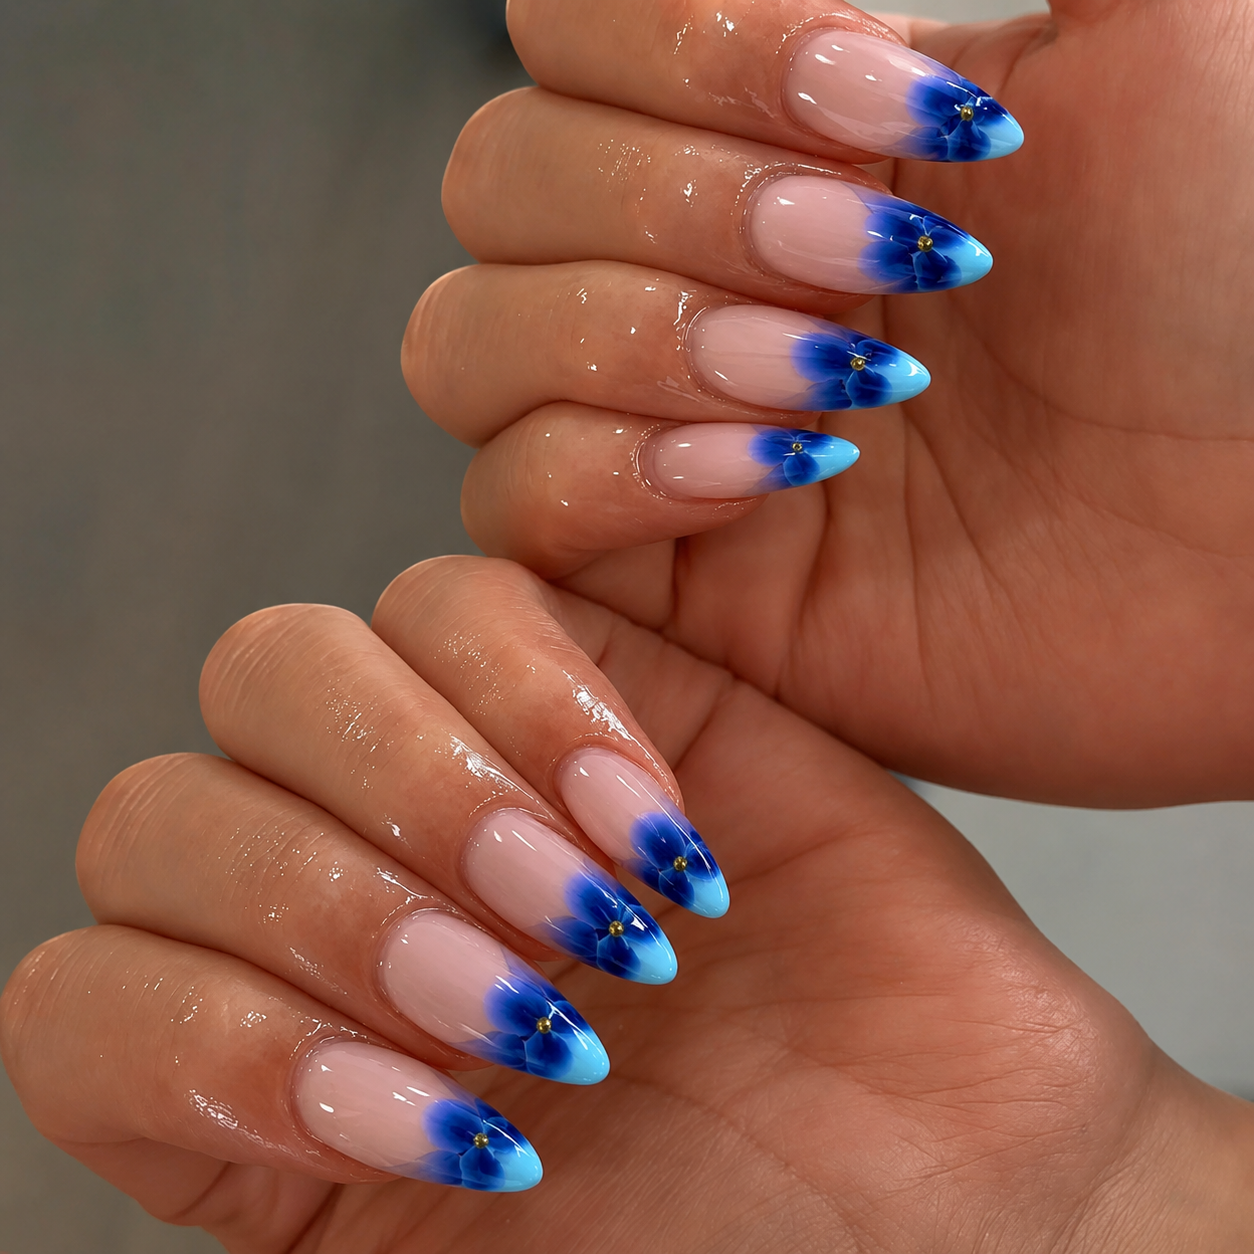
6. Cobalt Ombre Petals — Modern French Blooming Gel Tips
A total upgrade to the classic French mani. This design uses blooming gel to create deep blue floral tips that fade into a clear base. It’s crisp, nautical, and features tiny gold beads for that extra “it-girl” touch.
- Style Insight: Focus the blooming action only on the tips to keep the overall look clean and intentional.
- Who it Suits: People who love a French tip but want a modern, artsy twist.
- When to Wear: Garden parties, spring brunches, or whenever you’re feeling effortless.
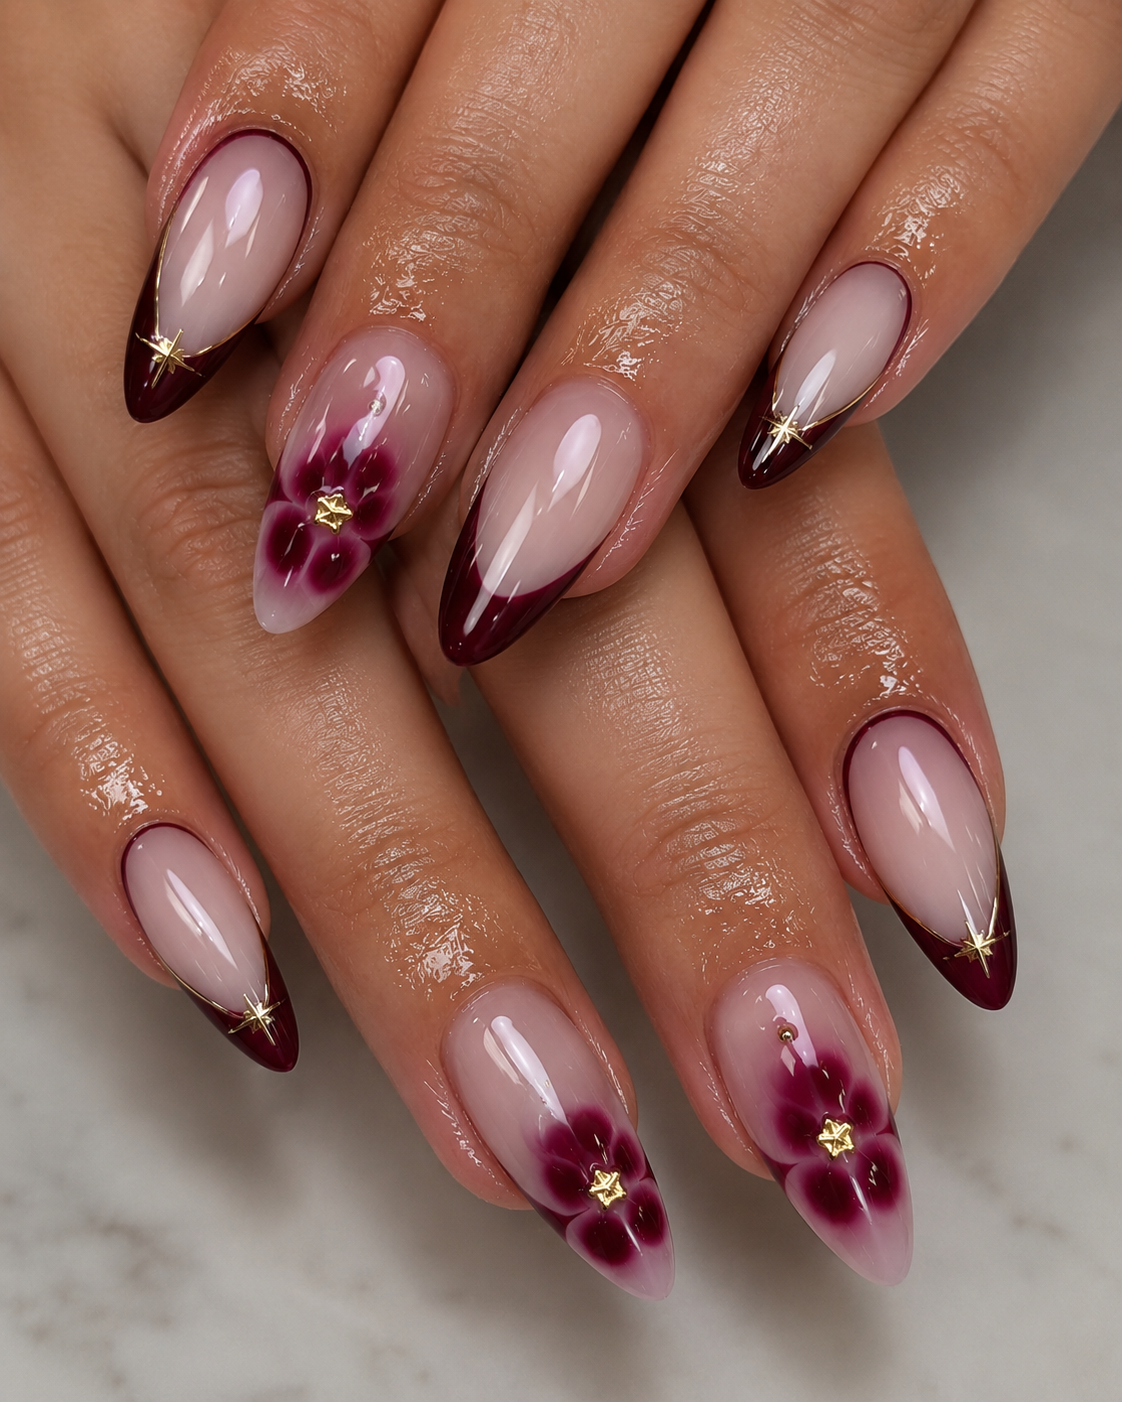
7. Deep Wine & Gold Radiance — Quiet Luxury Blooming Gel Nails
This luxurious set pairs deep plum French tips with intricate blooming “pansy” designs. The vibe is regal and classic, especially with the gold starburst details catching the light. It’s the ultimate “quiet luxury” look with a creative spin.
- Style Insight: Optimize the look by using a sheer base so the rich floral colors take center stage.
- Who it Suits: The sophisticated professional who appreciates classic beauty with a twist.
- When to Wear: Holiday dinners, theater nights, or big celebrations.
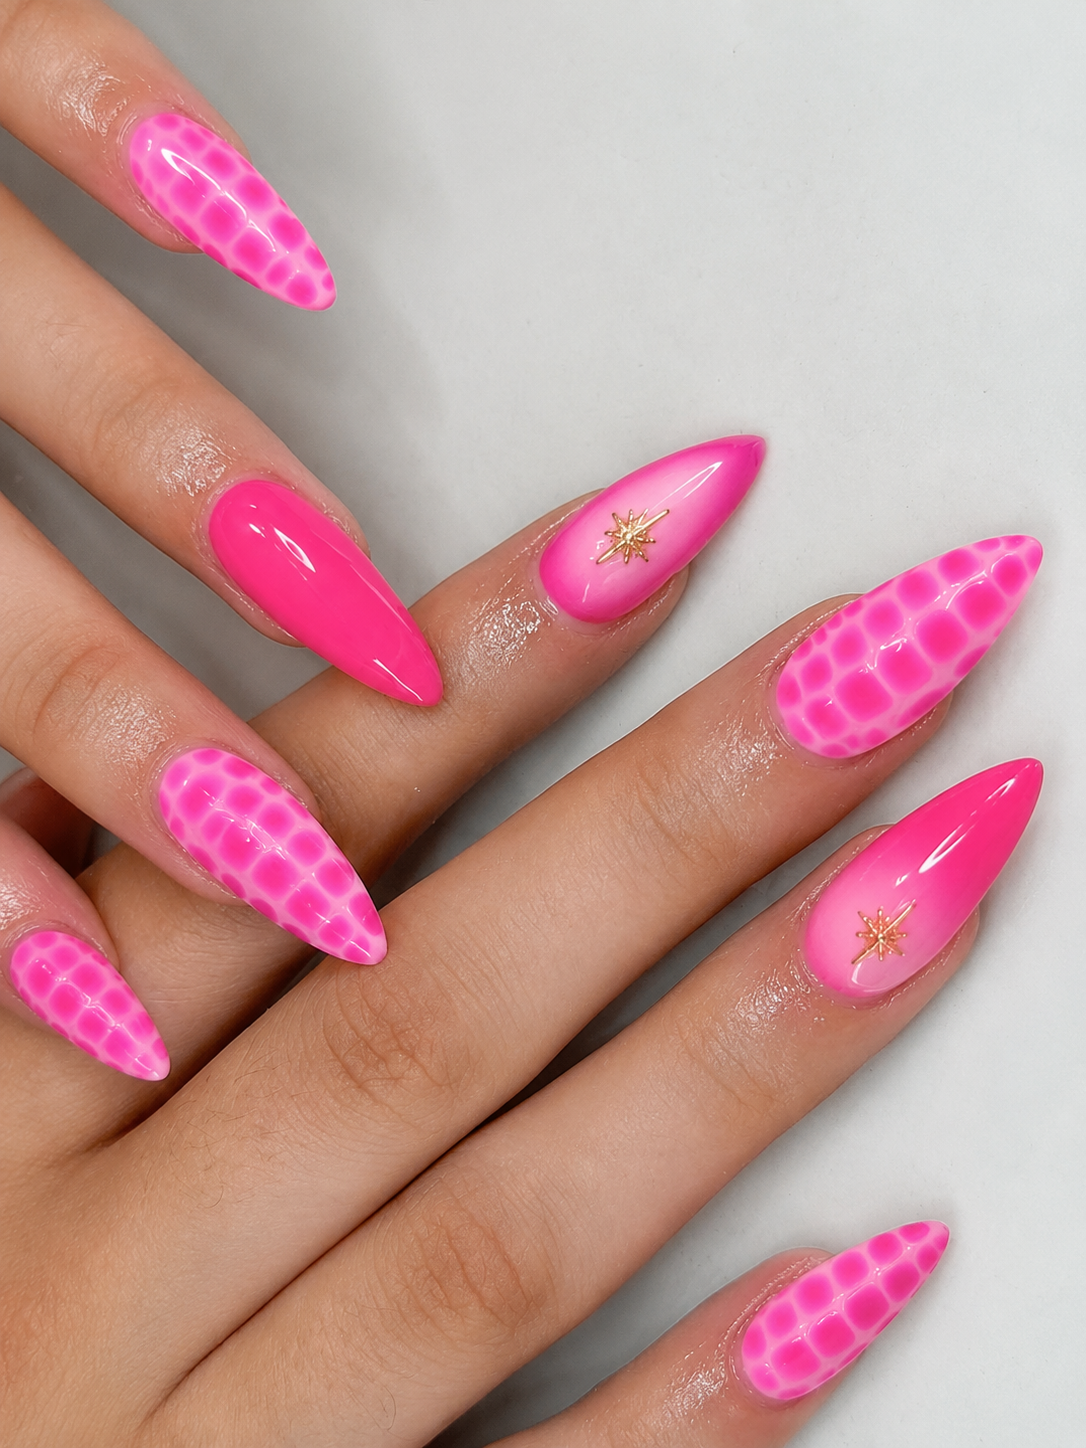
8. Neon Pink Python — Bold Blooming Gel Nail Trend
This is a high-octane, “Barbiecore” dream. It uses the blooming gel technique to create a vibrant neon pink crocodile print that is loud, fun, and totally unapologetic. The gold starburst accents add that extra bit of “main character” energy.
- Style Insight: The “python” effect is achieved by dropping color into wet gel in a structured grid, it’s all about the placement!
- Who it Suits: Bold individuals who live for bright colors and statement fashion.
- When to Wear: Birthdays, summer parties, or anytime you need a mood boost.
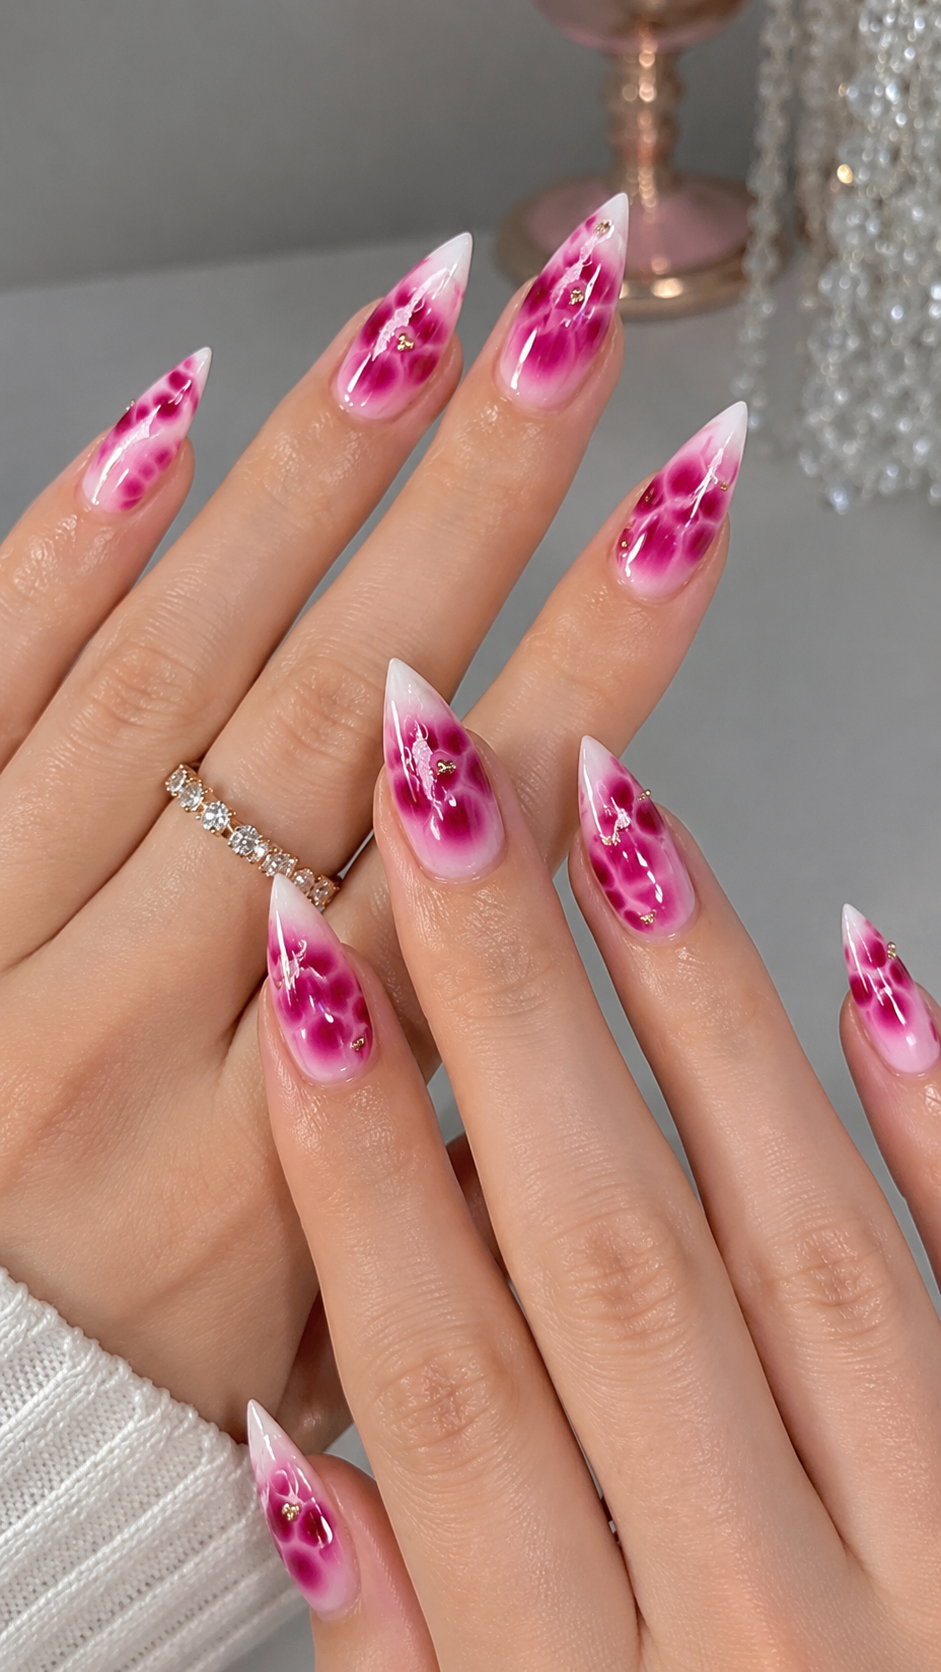
9. Magenta Petal Burst — High-Contrast Blooming Gel Nail Art
High-contrast drama at its finest. This look features deep magenta “blooms” against a stark white base, looking like ink spreading in water. The aesthetic is sharp, crystalline, and feels very fashion-forward.
- Style Insight: Keep the white base totally opaque to make sure the magenta blooms look as vivid as possible.
- Who it Suits: Lovers of abstract art and anyone who likes their nail art to have an edge.
- When to Wear: Fashion events, gallery openings, or whenever you want to look avant-garde.
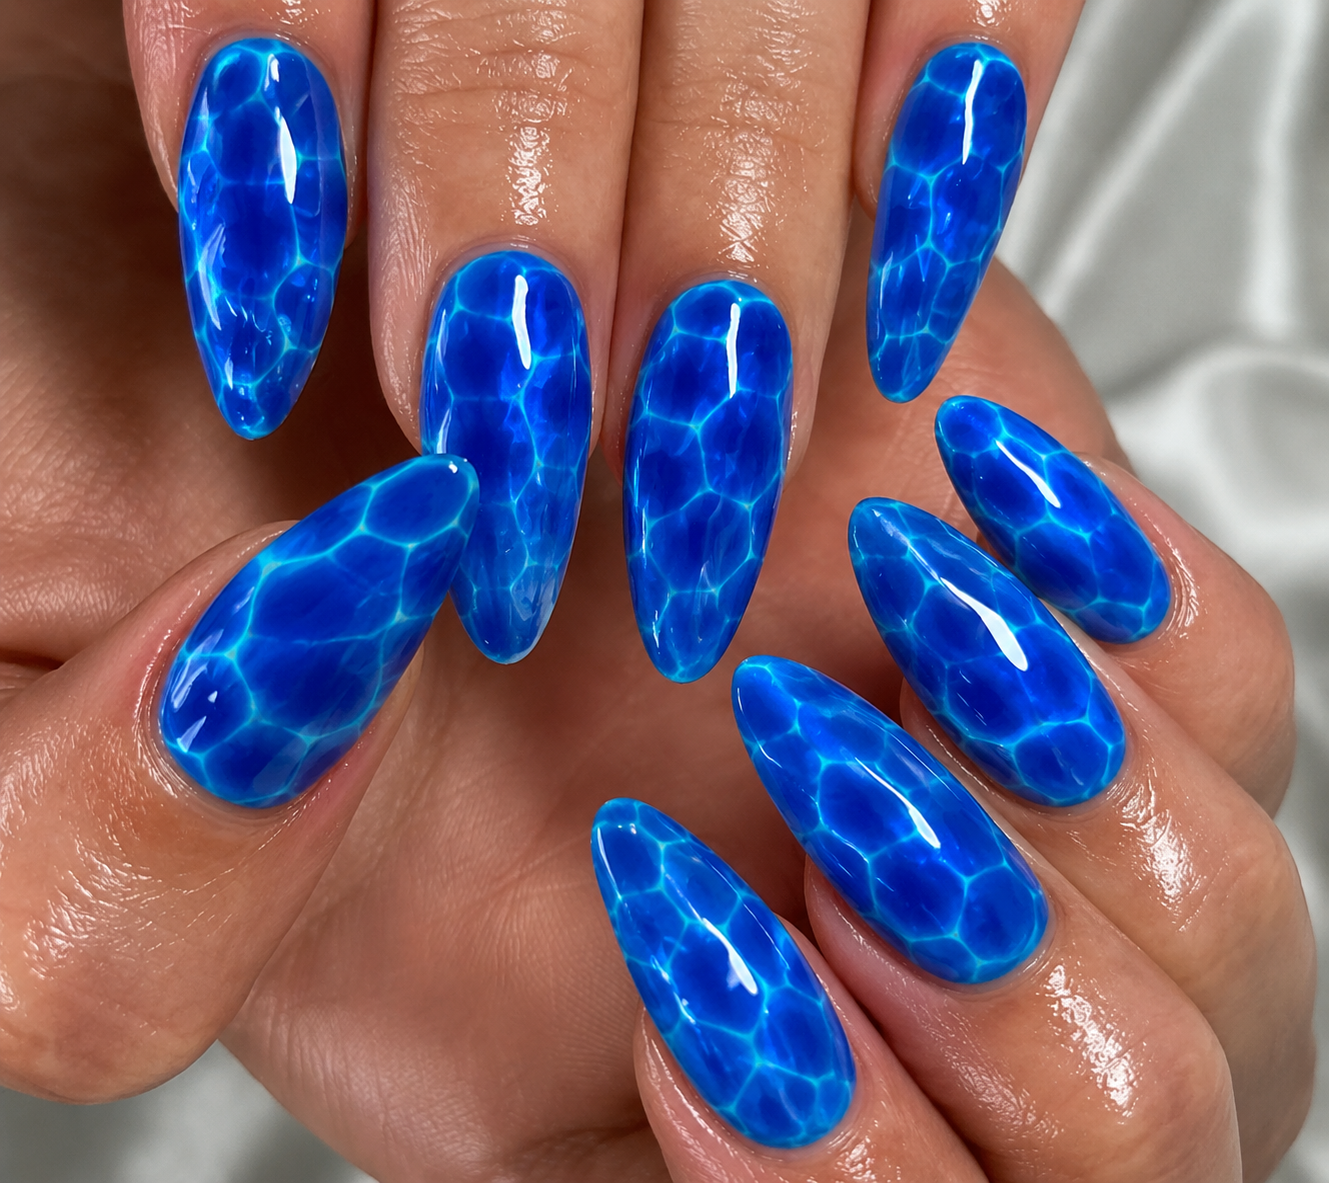
10. Deep Sea Ripples — Mesmerizing Blooming Gel Nail Design
This design is honestly mesmerizing, it looks exactly like sunlight hitting the bottom of a tropical pool. The mood is serene but powerful, achieved by dropping light blue or white circles into a blooming base. It’s basically a vacation for your hands.
- Style Insight: To achieve this, apply a dark blue base, then your blooming gel, and “dot” on a lighter blue.
- Who it Suits: Nature lovers or anyone wanting that “mermaidcore” aesthetic.
- When to Wear: Beach trips, poolside lounging, or whenever you’re dreaming of summer.
How to Secure the Blooming Gel Nail Look
Ready to try it? Here’s what you need for your starter kit:
- Blooming Gel: The clear base that makes the magic happen.
- Pigmented Gel Polish: Brighter colors usually bloom the best.
- Detailing Brushes/Dotting Tools: For precise placement.
- UV/LED Lamp: To “freeze” your design in place.
- Extras: Gold studs or a high-shine top coat to seal it all in.
Step-by-Step:
- Apply your base color and cure.
- Apply a thin layer of Blooming Gel, DO NOT CURE.
- While it’s wet, drop in your colors. Wait 5 to 10 seconds for the “bloom.”
- Once it looks fire, cure it immediately.
- Finish with a top coat and cure again.
Which of these looks is a total mood for you, are you more “Deep Sea Ripples” or “Neon Pink Python”?
Frequently Asked Questions About Blooming Gel Nails
What is blooming gel and how does it work?
Blooming gel is a specially formulated clear gel that stays in an uncured, “wet” state so that when you drop pigmented gel colors on top, they naturally spread and diffuse into gorgeous watercolor-like patterns. The key is to apply your colors while the blooming gel is still wet, then cure everything together once you’re happy with the design. It’s the secret behind all those dreamy, organic nail art looks you see going viral online.
Can I do blooming gel nails at home, or do I need a professional?
Absolutely, you can achieve beautiful blooming gel nail art at home, it’s actually one of the more forgiving gel nail techniques because the spreading is natural and organic, so minor placement imperfections become part of the design. You will need a UV/LED lamp, a quality blooming gel base, and pigmented gel polishes to get started. With a little practice, your at-home results can look seriously salon-worthy.
How long do blooming gel nails last?
When properly applied and cured, blooming gel nails can last anywhere from two to four weeks, just like a standard gel manicure. The longevity depends on nail prep, the quality of your products, and how well you apply your top coat. Make sure to cap the free edge of your nail when applying top coat to prevent premature chipping or lifting.
What nail shapes work best with the blooming gel technique?
Blooming gel looks stunning on virtually every nail shape, but almond, oval, and coffin shapes tend to give the most canvas space for those gorgeous spreading patterns to really shine. Shorter, rounder shapes like round or squoval can also look amazing, especially with more minimal or single-bloom designs. Ultimately, it comes down to personal preference and whichever shape makes you feel your most confident.
Can blooming gel be used over regular nail polish, or does it need gel polish?
Blooming gel is specifically designed to work within a gel system, so it needs to be used with gel polish and cured under a UV/LED lamp, it won’t work over regular air-dry nail polish. For the best results, apply your gel base coat, your chosen gel color, and then your blooming gel layer before adding your pigmented gel drops. Trying to use it with regular polish won’t give you that signature “bloom” effect and may cause adhesion issues.
Ready to Make Your Nails the Main Character?
Whether you’re obsessed with the moody drama of “Gothic Rose & Croc Print” or living for the serene beauty of “Deep Sea Ripples,” blooming gel nails offer something truly magical for every personality and every occasion. This watercolor nail art technique is one of the most creative and rewarding trends to hit the beauty world in a long time, and the best part? You can absolutely recreate these looks at home with the right tools. Bookmark this post, grab your blooming gel starter kit, and get ready to create your most jaw-dropping manicure yet. Tag us in your creations, we absolutely love to see your nail art magic!
Hi, I’m Amber, the creator behind Dazzle Me Nails. I started this site because I’ve always believed nails aren’t just about beauty, they’re about confidence, self expression, and feeling put together in the simplest way. Like many of you, I’ve struggled with weak nails, chipped polish, and designs that looked good online but didn’t work in real life. That’s why I created Dazzle Me Nails to share nail ideas that are practical, wearable, and easy to recreate.
Here, you’ll find minimalist nail designs, trend inspired looks, and simple nail care tips to help you achieve clean, polished nails without over complicating your routine. If you love soft, classy, and effortless nail styles, you’re in the right place.