
I ruined an entire set of pink florals three winters ago because I painted the petals too thick. The whole design lifted off my ring finger within two days. Since then, I’ve tested probably forty different approaches to getting a pink floral nail design to actually stick, and still look soft, glossy, and fresh on pink bases. These four looks are the ones that survived real life.
What Makes a Pink Floral Nail Actually Work
Pink floral nail designs walk a fine line. Too literal and they look like wallpaper from 1987. Too abstract and nobody knows what they’re looking at. The sweet spot, at least in my experience testing these on myself and six friends with wildly different nail beds, is keeping petals small and using no more than three colors per nail.
These looks range from wedding-ready to casual brunch. None of them require professional tools, though a thin brush makes life easier.
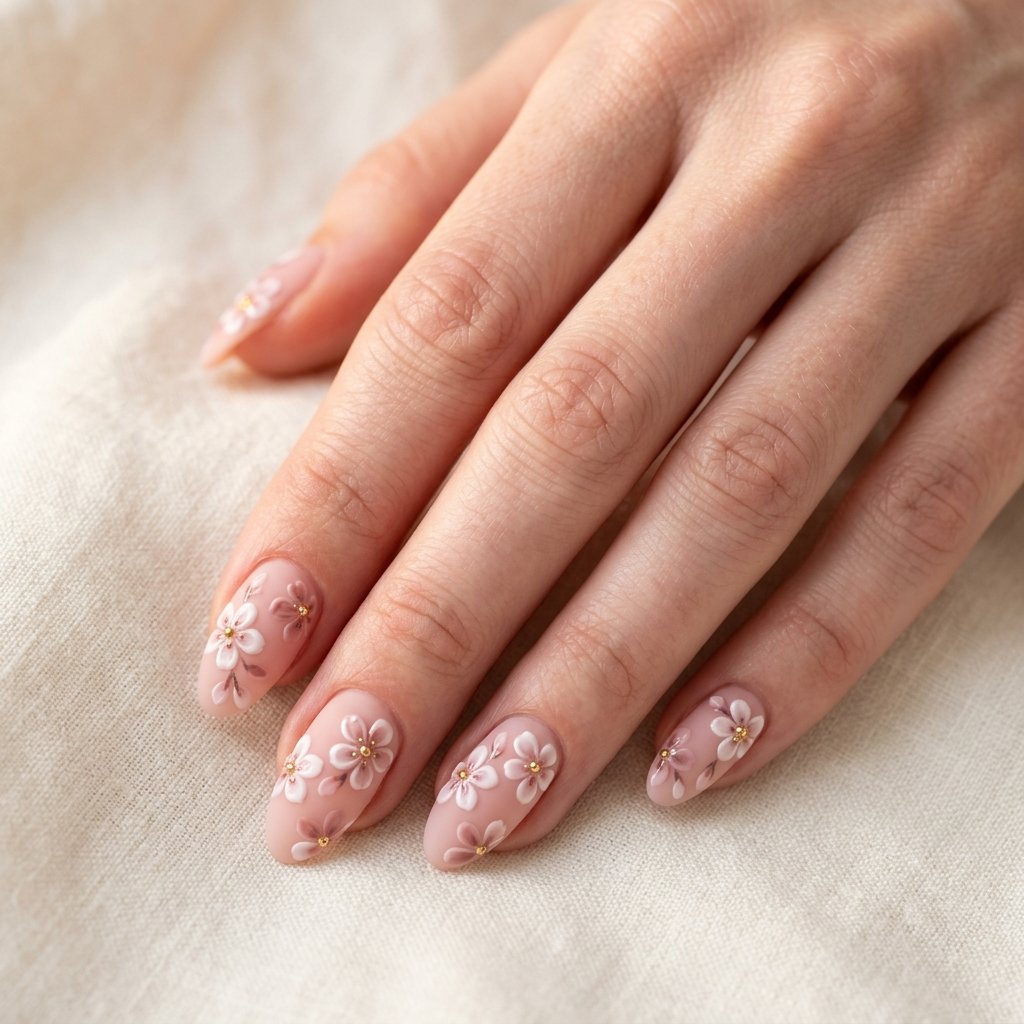
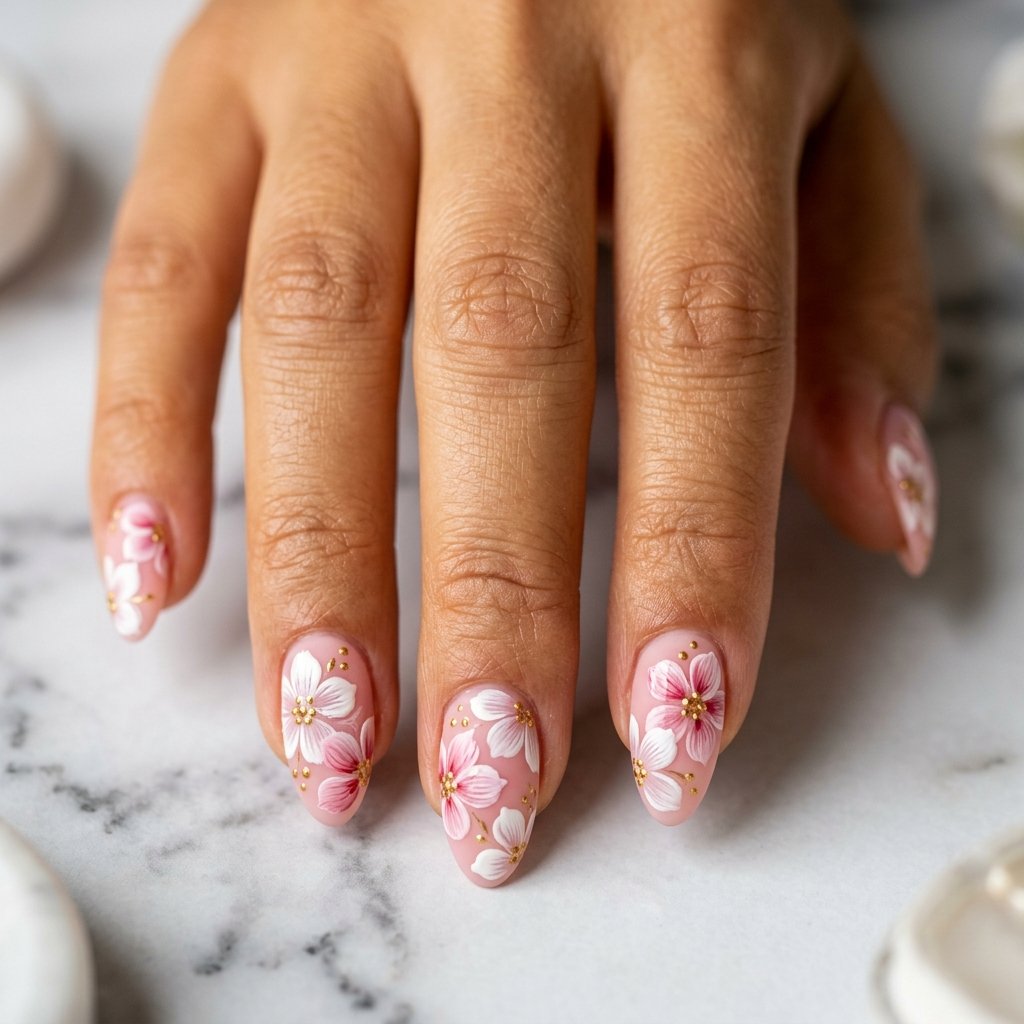
Soft Cherry Blossom on Blush, The One That Photographs Best
This pink floral nail look consistently gets the most compliments. Something about the matte-and-gloss contrast makes it pop in photos without looking overdone in person.
Start with two thin coats of a sheer blush pink, I mean thin, not the glob most people apply. Let each coat dry three full minutes before the next. The florals go on after your second coat cures but before top coat. Use white and a slightly deeper dusty rose for your petals. Five small petals per flower, no bigger than a lentil. Gold center dots should be actual dots, not blobs.
Here’s what most tutorials skip: matte top coat first over the whole nail, then go back with glossy top coat only on the raised petals using a detail brush. This takes an extra four minutes but creates the dimension that makes strangers ask where you got them done.
Products I’d Repurchase
Essie Nail Polish in Ballet Slippers
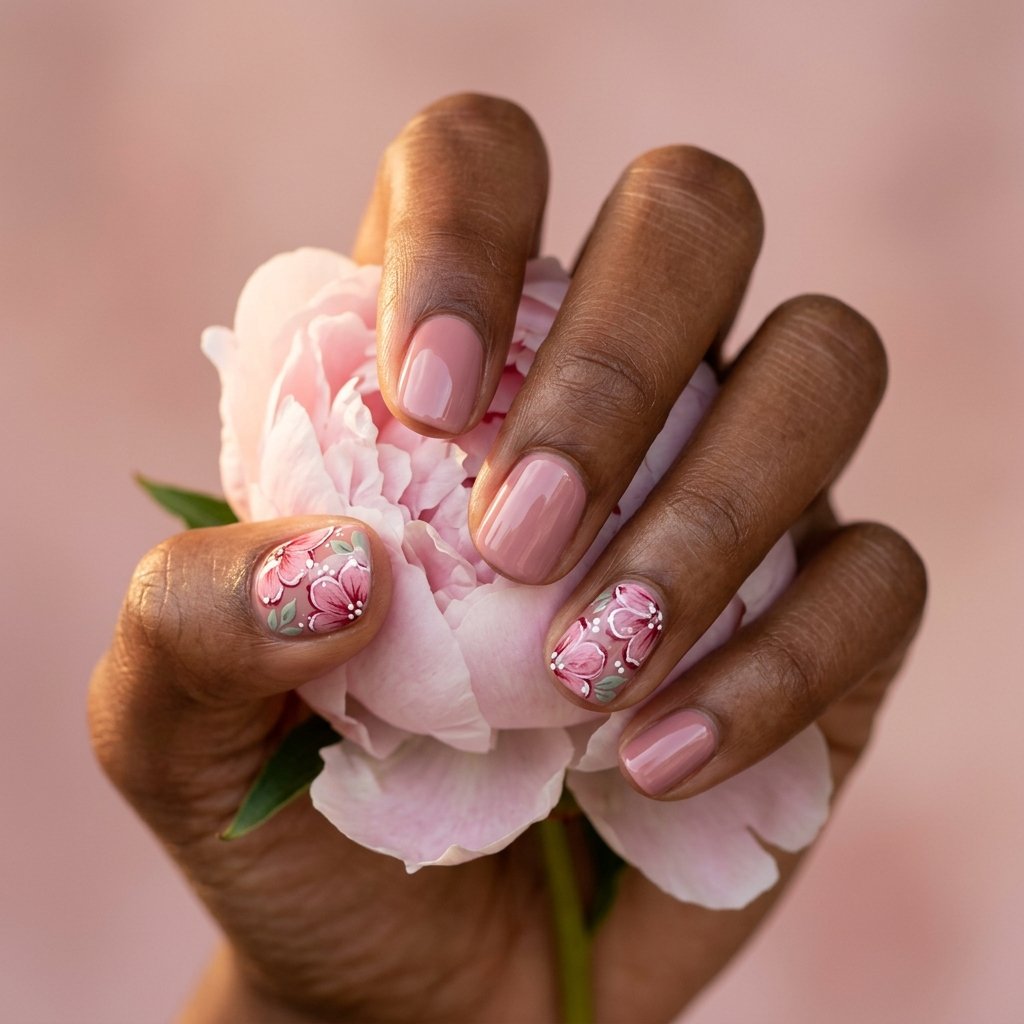
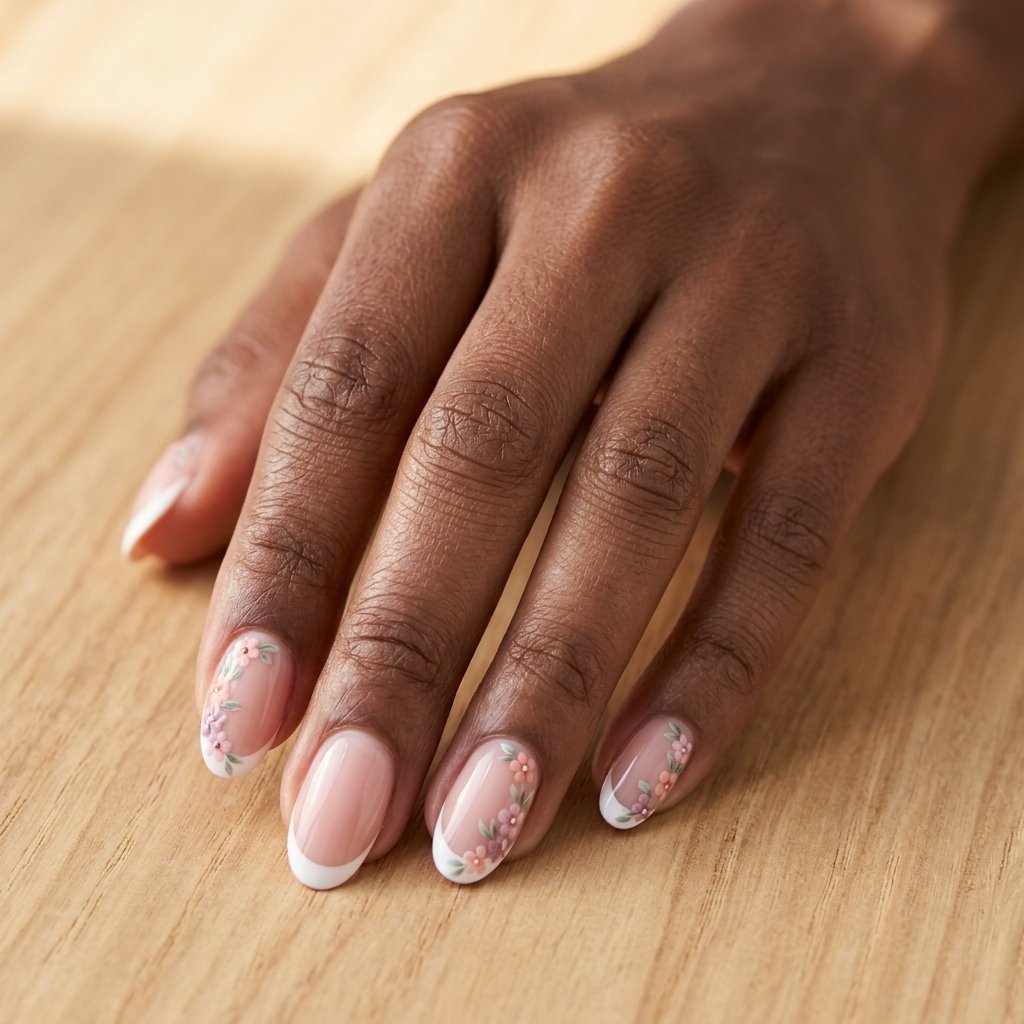
Pressed Flower Accent Nails, For When You Want Subtle
Not everyone wants flowers on all ten fingers. Fair enough.
This version puts detailed florals on just ring fingers and thumbs, with the remaining nails in a coordinating dusty rose cream. The contrast keeps it interesting without screaming “look at my nails” during every meeting.
I’ve found this works best on shorter nails, the accent flowers need enough nail bed real estate to read clearly. On nails shorter than a centimeter past the fingertip, simplify to three-petal flowers instead of five. They still register as floral without looking cramped.
The technique here involves building flowers in layers. Base petal color first, let it dry fully. Then outline each petal with a slightly deeper shade using the thinnest brush you own. Finally, add a tiny white highlight dot on each petal’s upper curve. Tedious? Yes. Worth it? The depth looks almost 3D.
Amber’s Favorite
Beetles Gel Nail Polish Set Nude Pink Collection
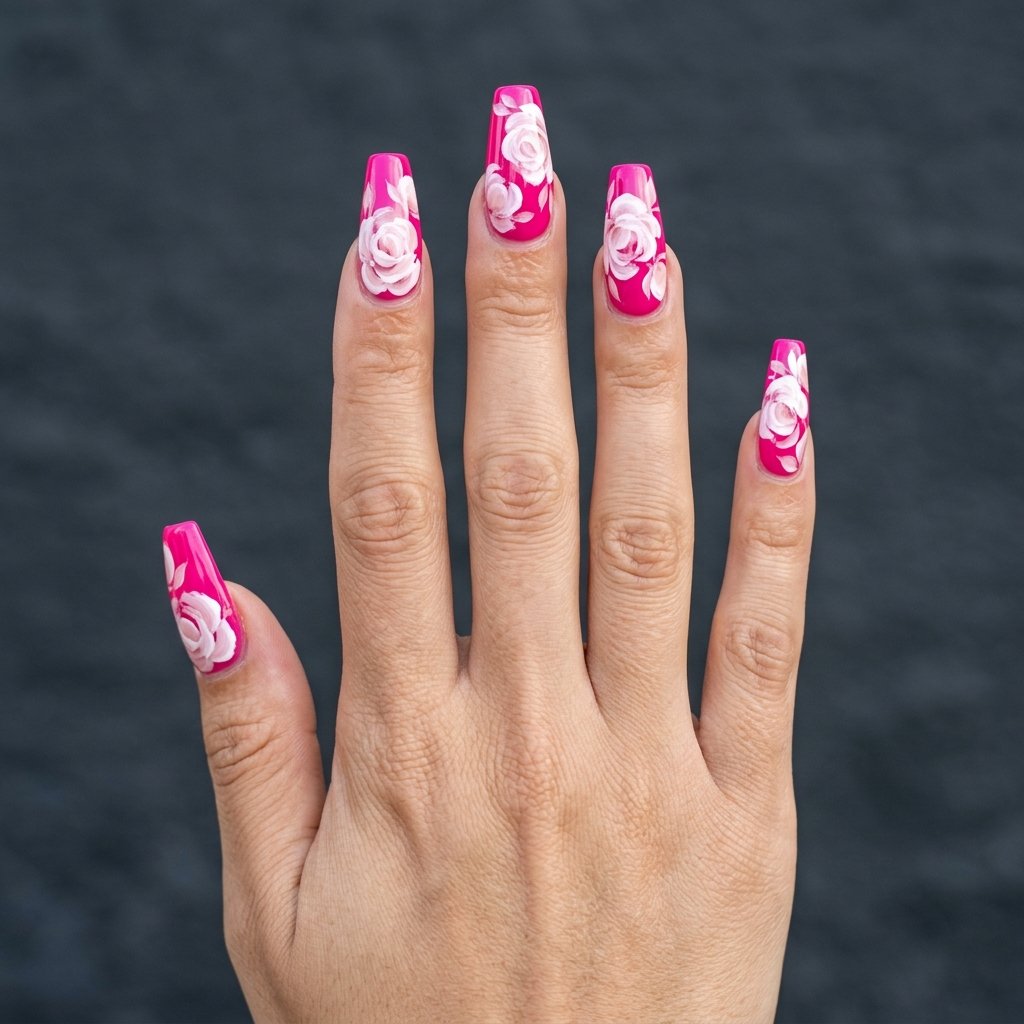
Hot Pink Maximalist Florals, The Bold Choice That Ages Well
I almost didn’t include this one because it feels loud. But here’s what changed my mind: I wore this exact look to a wedding last June and it still looks good in every photo eight months later. Trendy pastels date faster than you’d think. Saturated hot pink paired with white florals has a vintage quality that reads classic rather than dated.
The key is keeping flowers white or very pale blush against that hot pink. No other colors. The moment you add yellow centers or green leaves, it tips into craft-store territory.
Apply your hot pink in three thin coats rather than two thick ones, this shade tends to streak. Flowers here should be larger, almost abstract. Think loose roses, not botanical illustrations. Three to four petals per bloom, overlapping slightly. Finish with high-shine top coat only. Matte would fight the boldness.
This pink floral nail style suits medium to long lengths best. On very short nails, the hot pink overwhelms and the flowers get lost.
The Formula That Lasts
OPI Nail Lacquer in Pink Flamenco
French Tip Florals, The Unexpected Combination
Most people think of French tips as separate from nail art. But trailing a small floral cluster from the tip down toward the cuticle creates something surprisingly elegant. And practical, the white tip hides growth at the nail edge, so these last visually longer than full-coverage designs.
Use a soft nude pink for your base rather than stark pink. Traditional French white for the tips, but paint them slightly thinner than usual to leave room for the flowers. Your floral cluster starts at the tip’s corner and cascades down one side of the nail only. Never center it.
I tested this on my mom, who has wide nail beds, and on my roommate, who has narrow ones. Worked on both, though the narrow nails looked better with the cascade on the inner edge rather than outer.
Color-wise, keep flowers in the same family as your base, soft pinks, barely-there corals, hints of mauve. Contrasting flower colors fight with the French tip and the whole thing gets busy.
The Shade Behind The Nails
Sally Hansen Good Kind Pure Nail Polish in Crystal Coast
Technique Tips That Apply to Every Look
Brush quality matters more than polish quality. A $6 detail brush with good bristle control outperforms a $2 brush even if you’re using expensive polish. I’ve replaced cheap brushes three times before finally investing in a decent set. The bristles on cheap ones splay after two uses and your petals look fuzzy.
Dry time between layers is non-negotiable. I use a timer. Three minutes minimum between coats, five before adding any art. Rushing this step is why most DIY florals smudge or lift within days.
Seal the free edge. Run your top coat along the tip of your nail, not just the surface. This single step extended my floral wear time from four days to nine days on average across my last twelve manicures.
Common Questions About Pink Floral Nails
How long do pink floral nail designs typically last?
Regular polish florals tend to last five to seven days with top coat reapplication on day three. Gel versions hold closer to two weeks for most people, though I’ve seen faster chipping on anyone who uses their nails as tools, which, honestly, includes me sometimes.
Can beginners create these designs at home?
The pressed flower accent version is most beginner-friendly since you’re only decorating two nails. Start there. The hot pink maximalist requires the most brush control, so save that one until you’ve practiced basic petal shapes on a practice wheel or paper first.
What’s the best base color for pink floral nail art?
Sheer blush and nude pinks give you the most flexibility because small mistakes blend in. Opaque hot pinks show every uneven edge, so they demand steadier hands. Match your choice to your honest skill level rather than what looks best on Instagram.
Final Thoughts
A well-executed pink floral nail design outlasts most trend-driven looks. These four variations cover everything from subtle office-appropriate styles to statement pieces worth photographing. The techniques overlap enough that once you master petal painting on one, the others come faster.
Which style are you planning to try first, the matte-glossy cherry blossoms or something bolder?
Hi, I’m Amber, the creator behind Dazzle Me Nails. I started this site because I’ve always believed nails aren’t just about beauty, they’re about confidence, self expression, and feeling put together in the simplest way. Like many of you, I’ve struggled with weak nails, chipped polish, and designs that looked good online but didn’t work in real life. That’s why I created Dazzle Me Nails to share nail ideas that are practical, wearable, and easy to recreate.
Here, you’ll find minimalist nail designs, trend inspired looks, and simple nail care tips to help you achieve clean, polished nails without over complicating your routine. If you love soft, classy, and effortless nail styles, you’re in the right place.