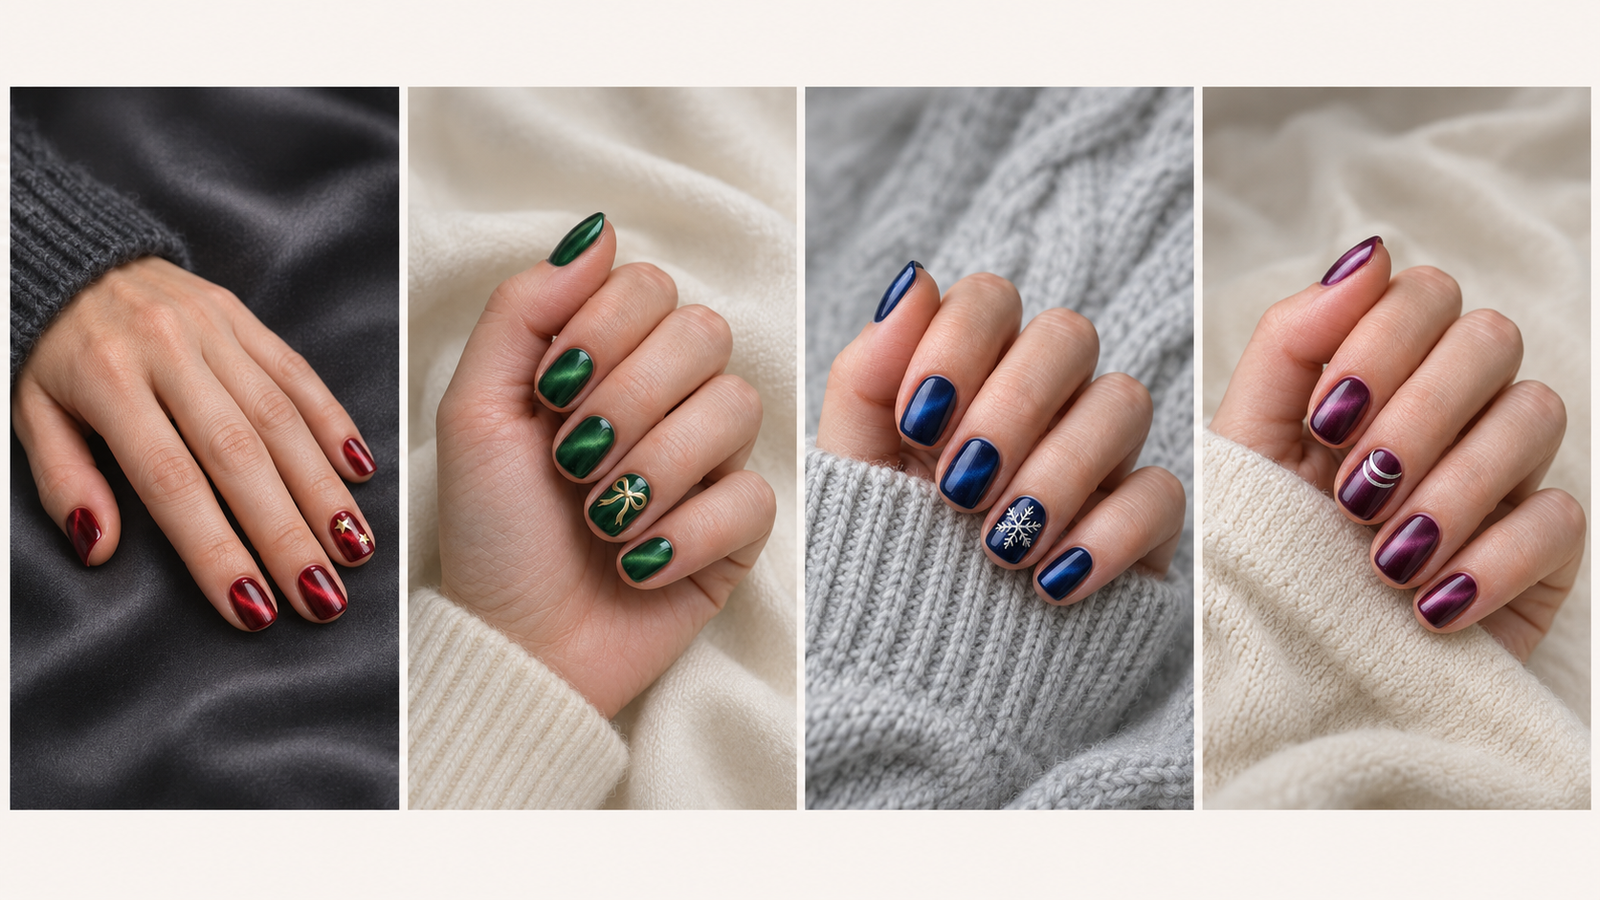
Some manicures look their best in a still photo. Velvet nails make you want to move your hand.
The name describes the appearance. The finished nail feels smooth.
A polish sold as “cat-eye” may also create a velvet effect. What you achieve depends on the formula, the magnet, and how you position it. A concentrated stripe creates a different reflection from a wider glow, so a reference photo helps when you are booking a salon appointment.
Both magnetic lacquer and magnetic gel can produce this finish. Lacquer air-dries. Gel requires the compatible lamp and curing process specified by its manufacturer.
When shopping for jewel-tone magnetic nail polish, check the formula type and look for photographs showing the effect you want. A product’s color name alone tells you little about how its shimmer behaves.
The same finish works beyond the holidays. Wear pink, nude, or champagne magnetic polish on its own for an everyday manicure, or leave off the seasonal artwork when you want the jewel tones to carry the look.
1. Ruby Velvet Nails With Tiny Gold Stars
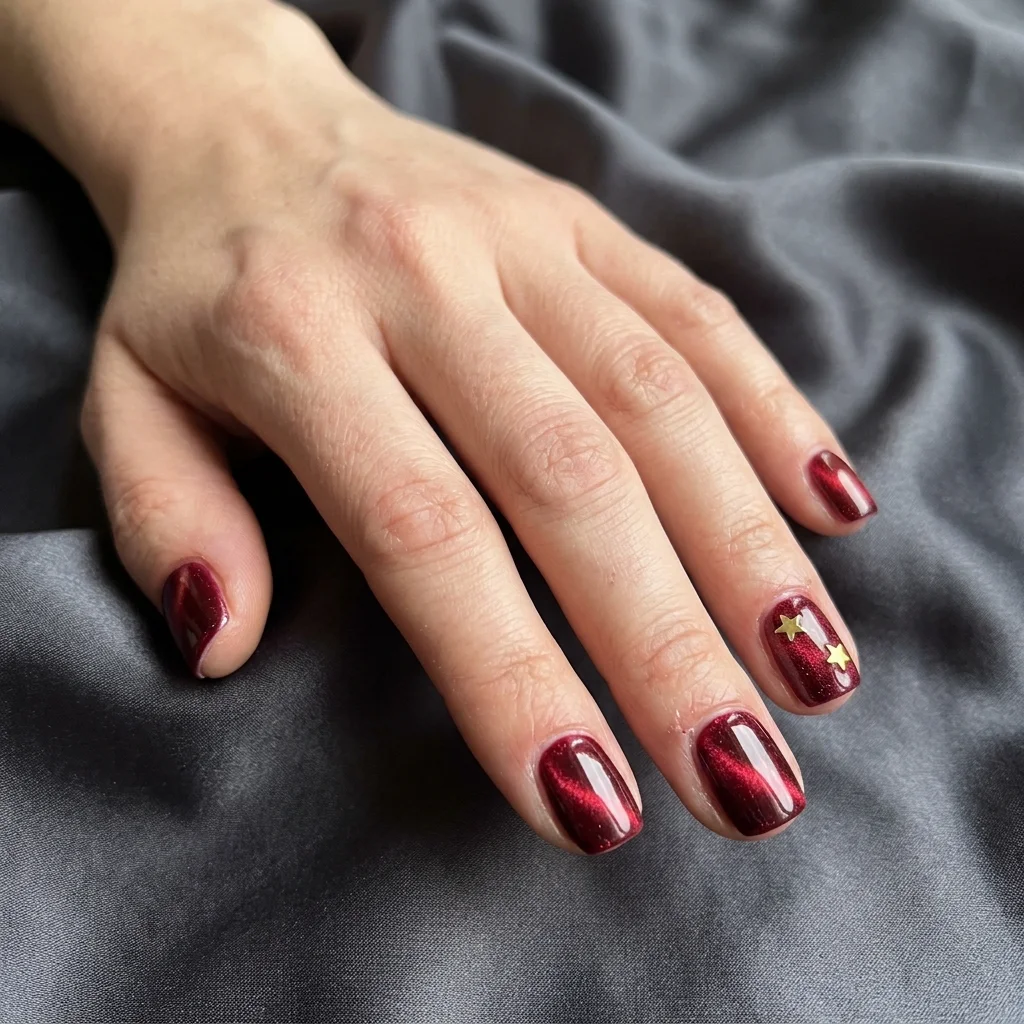
Ruby has a particular advantage at holiday gatherings. It still reads as red when the room gets dim.
Choose a jewel-toned shade with a bright red reflection across a deeper base. On short squoval nails, that sweep of light makes a simple full-color manicure feel dressed up. The gold detail belongs on one ring fingernail, where two miniature stars can sit slightly off-center.
Keep some ruby visible between them. If the stars touch or overlap, the accent becomes a gold patch and loses its shape.
For the cleanest version, use flat decals and follow their application instructions. A sheet of small gold nail star decals gives you several sizes to compare against your nail before committing.
This is the set I would pair with a black dress, a cream sweater, or a plain white shirt and gold earrings. There is already plenty happening in the polish, so the rest of the styling can be simple.
At the salon, ask for ruby magnetic polish with a wide velvet reflection and two tiny gold stars on one accent nail per hand.
If you are deciding between a cool ruby and a warmer scarlet, our red nail guide offers more ways to think about the shade.
2. Emerald Velvet With a Painted Ribbon
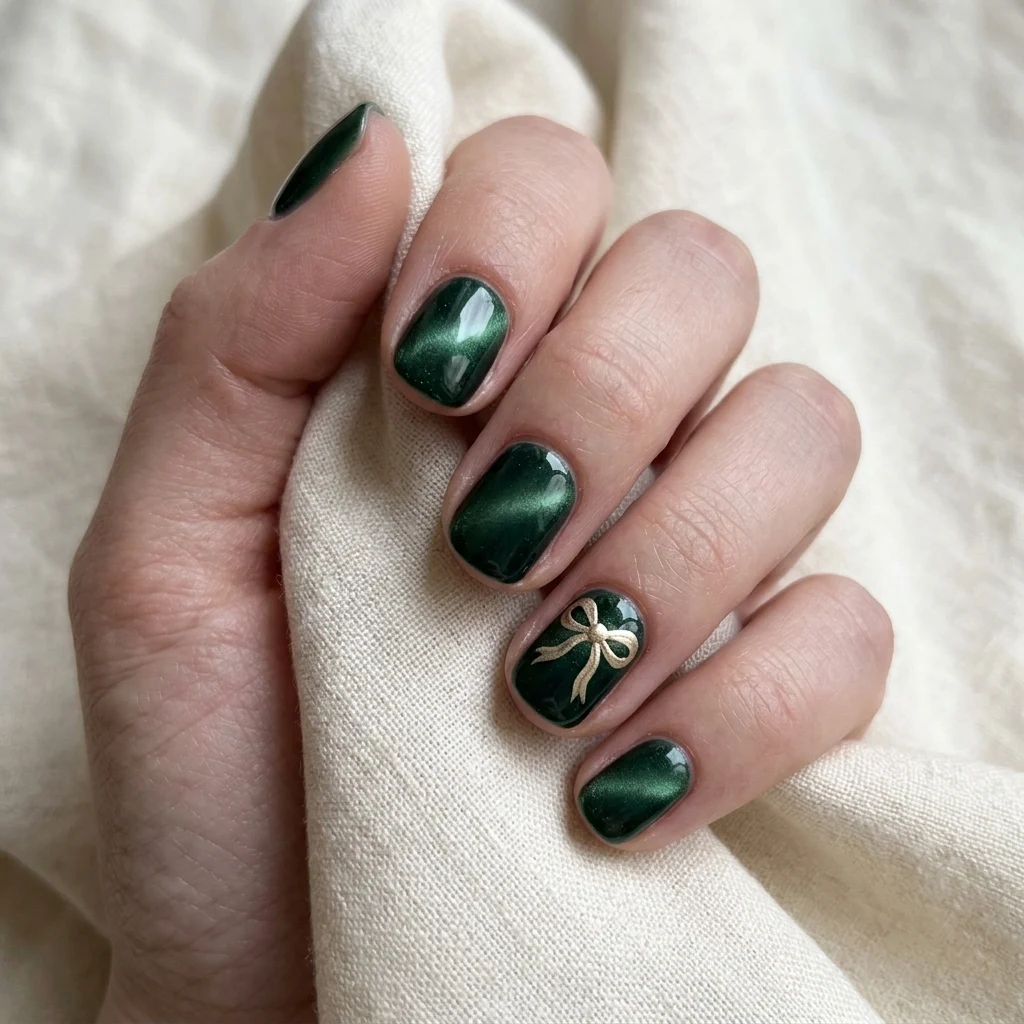
An emerald manicure can look nearly black in the bottle and surprisingly bright on the nail. Ask to see a finished swatch before choosing yours.
For this design, the green should remain visible around the magnetic reflection. A very dark base with a pale stripe can look dramatic, but a wider green glow gives the ribbon a richer backdrop.
Paint a fine champagne-gold bow on one nail. Place the knot just above the center and let the two tails fall toward the tip. The loops should be small enough to leave clear green space on both sides.
Short oval nails suit the soft curves particularly well. On squoval nails, a slightly narrower bow leaves more breathing room near the corners.
A fine nail art liner brush is useful for painted ribbons, though this is a detail worth practicing on a spare tip first. Draw the two loops, pause, then add the tails. Trying to finish the entire bow in one movement makes it harder to control.
Wear this set for a December dinner or gift exchange. A small ribbon gives the manicure a recognizable holiday reference while the emerald keeps it polished.
Save this salon request — “Emerald velvet with a thin, flat champagne bow on my ring fingers. Please keep the loops small enough to see the green around them.”
3. Champagne Velvet French Tips
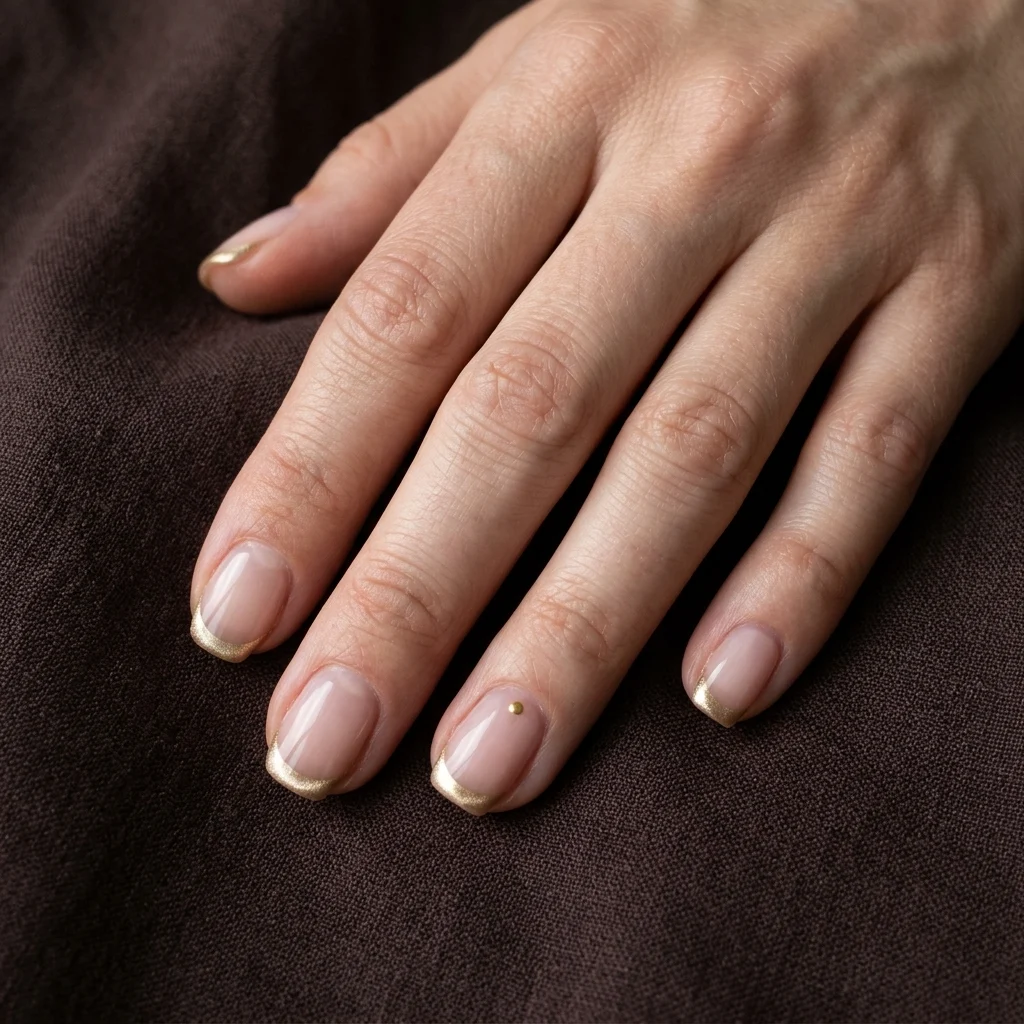
For a lighter manicure, put the magnetic finish at the tips and leave the rest of the nail sheer.
The base should be a pink or beige that looks comfortable against your skin. The champagne tip can lean pale gold, soft bronze, or a cooler beige shimmer. Compare the two together before painting the full set. A strongly yellow tip over a very cool pink base can create more contrast than you expected.
The proportions matter most on short nails. Keep the tip narrow enough that the sheer center remains visible. When the metallic section travels too far down the sides, the design begins to feel heavier.
Add one tiny gold dot near the base of each ring fingernail if you want an extra detail. It creates a little connection between the cuticle area and the reflective tip.
This is a useful choice when your calendar includes several kinds of events. It works with work clothes during the day and catches more light when you change into something for dinner.
Bring this wording to your appointment — “A sheer base with slim champagne magnetic French tips and a broad, soft reflection.”
The finished effect depends on how the magnetic polish is applied within that small area. For a very short nail, ask your tech to test one tip before repeating it across the set.
4. Midnight Blue and a Silver Snowflake
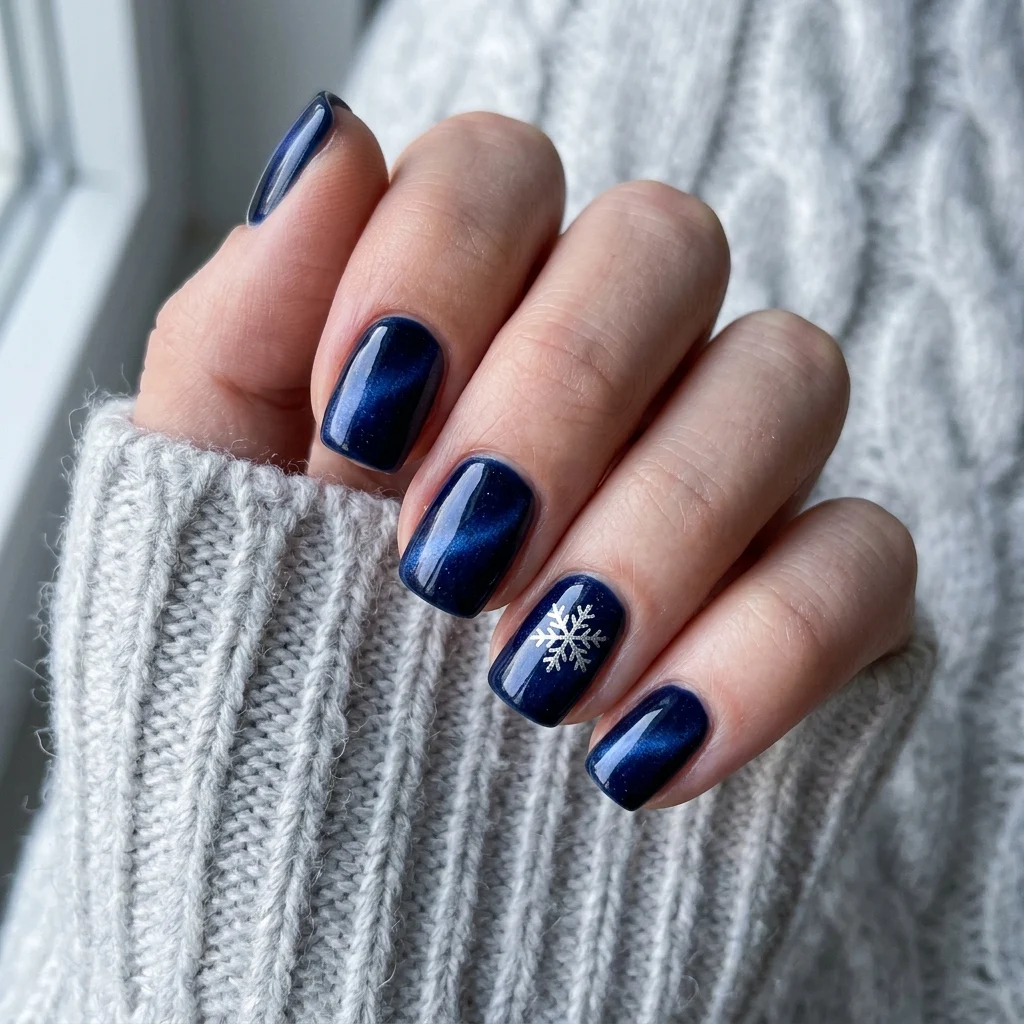
Midnight blue velvet nails give a silver snowflake a background that feels almost like an evening sky.
Choose a blue with enough color to remain visible away from direct light. A finished swatch will tell you more than a bottle held up to a salon lamp.
Keep most nails undecorated. On one accent nail per hand, add a fine snowflake with space between its branches. A short nail usually needs a simplified version with fewer tiny marks.
Placement can solve a lot of crowding. Shift the snowflake slightly toward one side instead of centering a large motif across the entire nail. A small part of the design can approach the edge, provided the remaining shape still reads clearly.
Silver paint gives a softer result than a raised charm. A flat decal is another option when you want precise branches without hand-painting them.
I would choose this set for a winter concert or New Year’s Eve, especially with silver earrings or a gray knit. It also works well in photographs because the pale detail remains distinct against the dark polish.
For more deep shades, browse our dark fall nail ideas.
5. Sugar-Plum Velvet With Silver Crescents
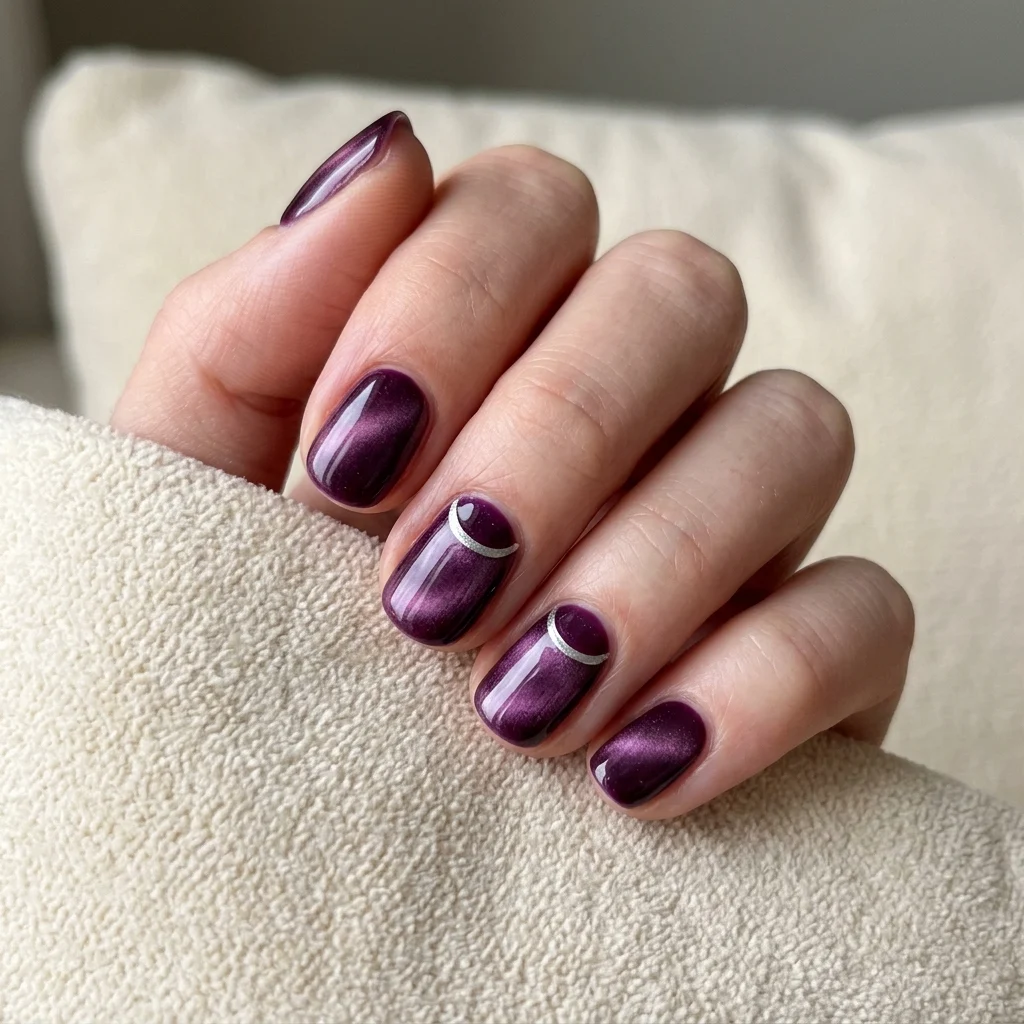
Plum is a good place to go when you want holiday color beyond red and green.
Look for a shade with a wine-purple base and a brighter mauve reflection. The difference between the darker edge and illuminated center creates the depth that makes this manicure interesting.
On two accent nails, trace a fine silver crescent near the cuticle curve. Leave a small gap from the surrounding skin and keep the line narrow. The crescent only needs to follow the lower curve of the nail.
Repeating the same silver detail on every finger can make a short set look busy. Start with the ring finger, then decide whether a second accent adds anything.
Short round and squoval nails both work here. If your nail beds are narrow, a partial crescent toward one side may fit more comfortably than a deep, symmetrical curve.
This is the most adaptable evening look in the group. It suits a holiday dinner, a winter wedding invitation, or a January birthday without needing a seasonal motif.
Show your tech a reference and say — “Rich plum velvet with fine silver cuticle crescents on two accent nails. I want the shimmer to stay visible through the center.”
6. Cherry Velvet With Candy-Cane Stripes
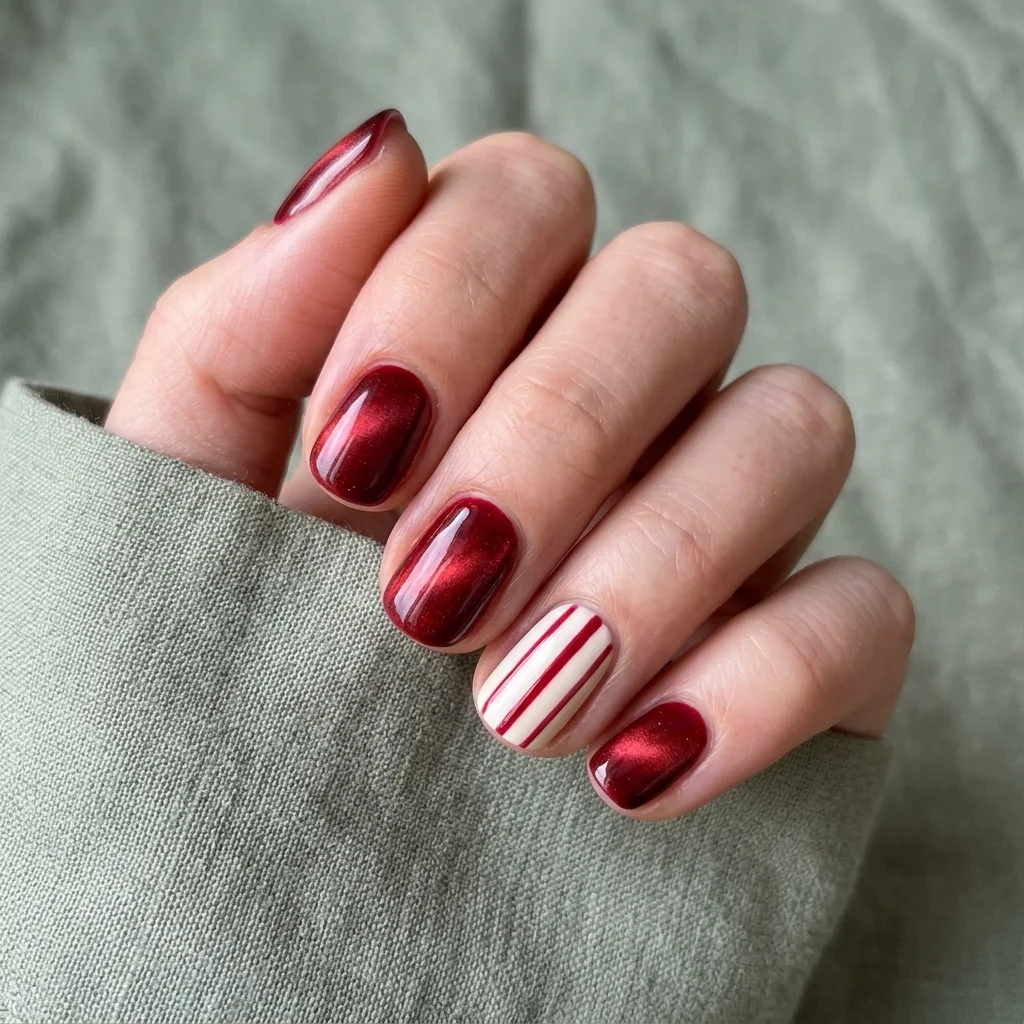
One striped nail is enough to make this set feel festive.
Paint most nails cherry red with a bright magnetic reflection. Give each hand one creamy-white accent nail, then add thin diagonal red stripes across it.
Use a similar red for the stripes and the magnetic base. They do not need identical finishes, but the colors should look related when your fingers sit together.
The white accent creates a clear break in the set, which is part of its appeal. Keep the stripes narrow and evenly spaced, with enough white showing between them. On a very short nail, three clean stripes may be all the design needs.
This manicure has the strongest Christmas reference of the six. It is a good choice for a holiday market visit, family photographs, or Christmas week itself.
At home, finish the striped accent separately so you can concentrate on the magnetic polish one nail at a time. Allow the artwork to set before applying a compatible glossy top coat for regular polish. Test the combination on a spare tip if you are concerned about the red dragging into the white.
Choosing a Look for Your Nail Length
Short velvet nails benefit from a clear focal point. Let the magnetic reflection cover most of the nail, then use decoration selectively.
| Your preference | A look to consider |
|---|---|
| Very short round nails | Ruby with one tiny star accent |
| Short oval nails | Emerald with a narrow painted bow |
| A light, sheer manicure | Champagne French tips |
| Winter-themed artwork | Midnight blue and silver snowflakes |
| Color you can wear into January | Plum with silver crescents |
| A clear Christmas detail | Cherry with a candy-cane accent |
Your smallest nail is a useful guide. If a decoration feels cramped there, leave it solid and place the artwork on a wider nail.
Our short nail design guide has more ideas for working with compact shapes.
Before leaving the salon, look at your chosen color away from the brightest task light. That is closer to how you will see it at your desk, in the car, or across a dinner table.
How to Do Velvet Nails With Magnetic Lacquer
For a home manicure, start with one magnetic shade and a plain finish. Add artwork once you are comfortable creating the reflection.
You will need a base coat, magnetic lacquer, a suitable magnet, and a compatible top coat. A magnet designed for a velvet nail effect can help, but placement and timing vary between tools and formulas. Follow the instructions for the products you buy.
Prepare the shape
File the nails to an even length and smooth any rough edges. Work on clean, dry nails and apply your base coat as directed.
If you plan to use decals, choose their sizes now. It is easier to compare them against bare nails than to handle a sheet while the polish is drying.
Build the color
Some magnetic lacquers need an initial coat for coverage before you magnetize the next layer. Others have their own recommended sequence.
Follow that sequence and work one nail at a time during the magnetic stage. Applying polish to every nail first may leave the first ones too dry to shape effectively.
Position the magnet while the polish is wet
Keep the tool stable and avoid touching the wet surface. With a horseshoe-style magnet, your finger typically sits within the opening. Other tools may be held beside or above the nail.
Watch the reflection as you work. If it gathers into a narrow stripe, adjust the placement according to the tool’s directions until you achieve the broader effect you want.
Hold the position for the recommended time. Rushing this part can give you a less defined result.
Finish according to the formula
Let the lacquer reach the stage recommended before top-coating. Some magnetic systems call for magnetizing again after the top coat, so check those instructions too.
Once the manicure is ready for decoration, add your chosen stars, stripes, or painted details and seal them as required.
If you are using magnetic gel instead, follow its specified application and curing process with the compatible lamp. Air-dry lacquer instructions do not transfer directly to gel.
Getting the Finish You Expected
A reference photo is helpful, but a short video can show your nail tech how you want the reflection to move.
Try to save examples with a nail length similar to yours. A wide highlight on a long almond nail will occupy a different proportion of a short squoval one.
If your first attempt looks like ordinary shimmer, check whether the formula was still wet when you used the magnet. The tool may also need a different position or more time. Test on one nail or a spare tip before changing the entire manicure.
If the artwork hides the effect, reduce its size or move it onto a single accent nail. You paid attention to choosing that magnetic color. Give it room to show.
Frequently Asked Questions
Can you get velvet nails without gel?
Yes. Magnetic lacquer can create the finish and dries without a curing lamp. Check the product description carefully, since magnetic lacquer and magnetic gel require different processes.
Do velvet nails work on short natural nails?
Yes. A broad reflection can look beautiful on a small nail plate. Keep bows, snowflakes, and metallic accents proportionate to the space available, or choose a plain magnetic finish.
What is the difference between velvet and cat-eye nails?
The names often describe different effects made with magnetic polish. A cat-eye design commonly has a more concentrated stripe, while a velvet manicure has a wider, softer reflection. Formulas and salon terminology vary, so show the finish you mean.
Can ordinary shimmer polish create the same effect?
Ordinary shimmer can look luminous, but a magnet will not shape it unless the formula is magnetic. Check that the polish is specifically described as magnetic before buying tools for it.
Which festive color should I choose first?
Ruby is an easy starting point if you already enjoy red manicures. Emerald gives you a richer Christmas palette, while champagne is a lighter option. For winter events beyond December, consider midnight blue or plum.
Save the look you would wear first and bring both the photograph and its description to your appointment. If you are trying the technique at home, begin with the magnetic color alone. A smooth ruby or emerald manicure already has plenty of holiday presence; you can decide on the tiny stars afterward.

Hi, I’m Amber, the creator behind Dazzle Me Nails. I started this site because I’ve always believed nails aren’t just about beauty, they’re about confidence, self expression, and feeling put together in the simplest way. Like many of you, I’ve struggled with weak nails, chipped polish, and designs that looked good online but didn’t work in real life. That’s why I created Dazzle Me Nails to share nail ideas that are practical, wearable, and easy to recreate.
Here, you’ll find minimalist nail designs, trend inspired looks, and simple nail care tips to help you achieve clean, polished nails without over complicating your routine. If you love soft, classy, and effortless nail styles, you’re in the right place.