
Cherry red nails ruined three of my manicures before I figured out what keeps them looking wet-glossy instead of chalky. The culprit was my top coat timing. Applied it too soon on that deep pigment, got bubbles. Waited too long, lost the shine within two days. Cherry red punishes mistakes more than any other color I work with because it shows every flaw, every streak, every dust particle, every brush mark lands in high definition against that saturated base. That’s why getting cherry red nails to look smooth, glossy, and salon-fresh takes more precision than most people realize.
But when you nail it? Nothing else compares. Cherry red reads confident without trying too hard.
Why These Four Cherry Red Looks
Cherry red spans a wider range than most people realize. You can take it glossy and classic, dial it back to matte sophistication, add dimension with micro-glitter, or go full drama with chrome. I picked these four because they solve different problems, the classic that works for job interviews and weddings, the matte that photographs without flash glare, the sparkle that catches light without looking juvenile, and the chrome that makes short nails look intentional rather than stubby.
Not every red flatters every skin tone. I’ll tell you which ones work where.
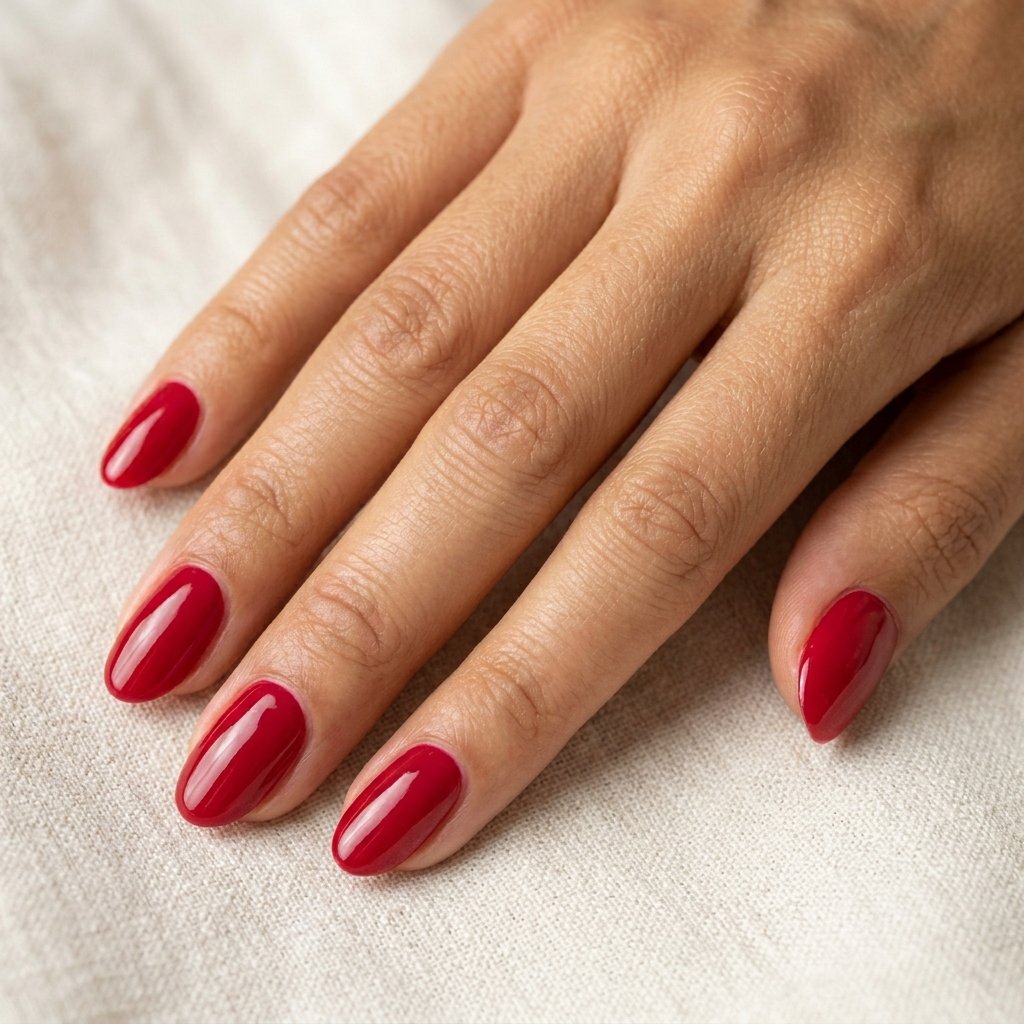
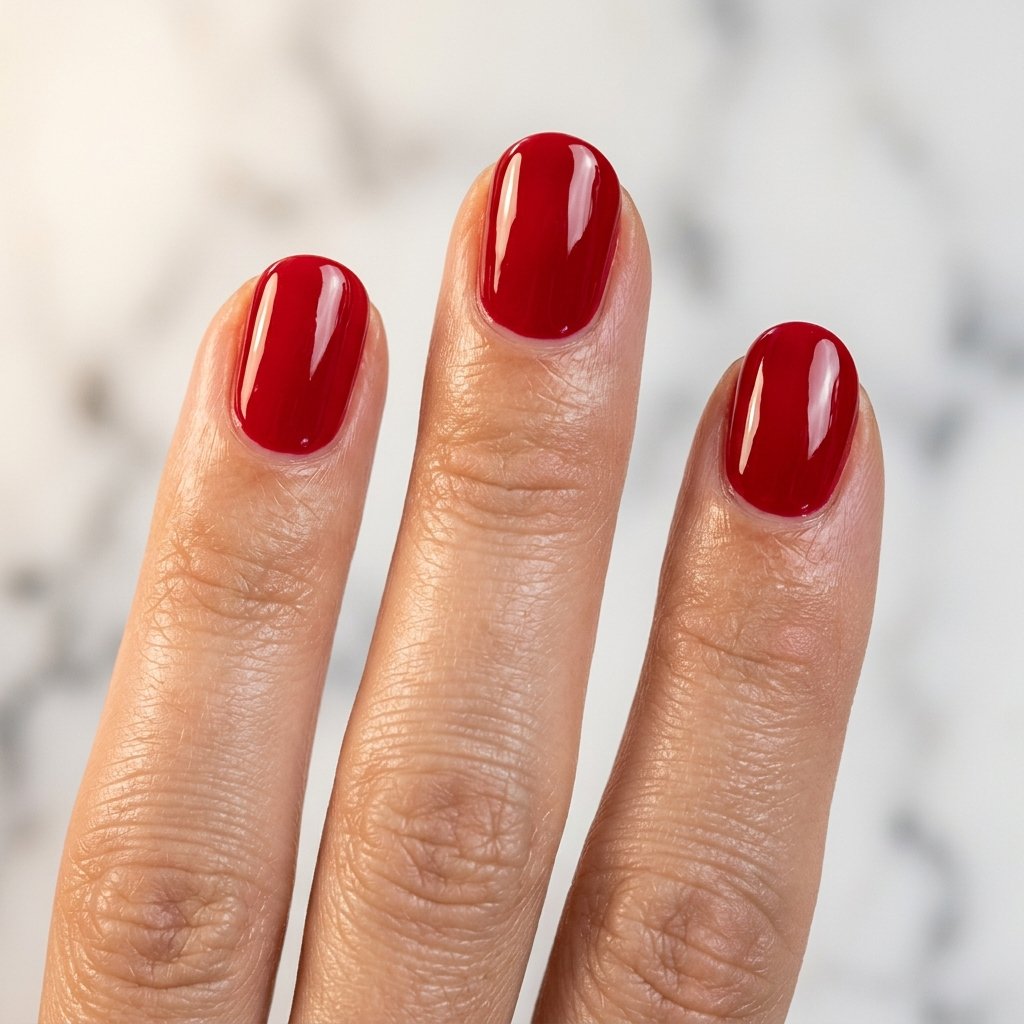
The Classic Glossy Cherry That Works Everywhere
This is the look that got me hooked on doing my own nails eight years ago. A true cherry red with the faintest blue undertone, applied in three thin coats instead of two thick ones. Most tutorials say two coats. They’re wrong for this specific shade, cherry reds tend to show brush strokes when you try to build opacity too fast.
The trick nobody mentions: let each coat dry for 90 seconds minimum. I timed this with six different cherry polishes. Rushing to the next coat is how you get that frustrating peeling at the tips by day three.
For skin tones, this classic glossy cherry flatters warm medium and deep skin tones beautifully. On very fair cool-toned skin, it can read slightly orange, I’ve seen this happen on three different friends. If that’s you, look for a cherry labeled “blue-based” specifically.
The Cherry Red I Reach For Most
Essie Nail Polish in Forever Yummy
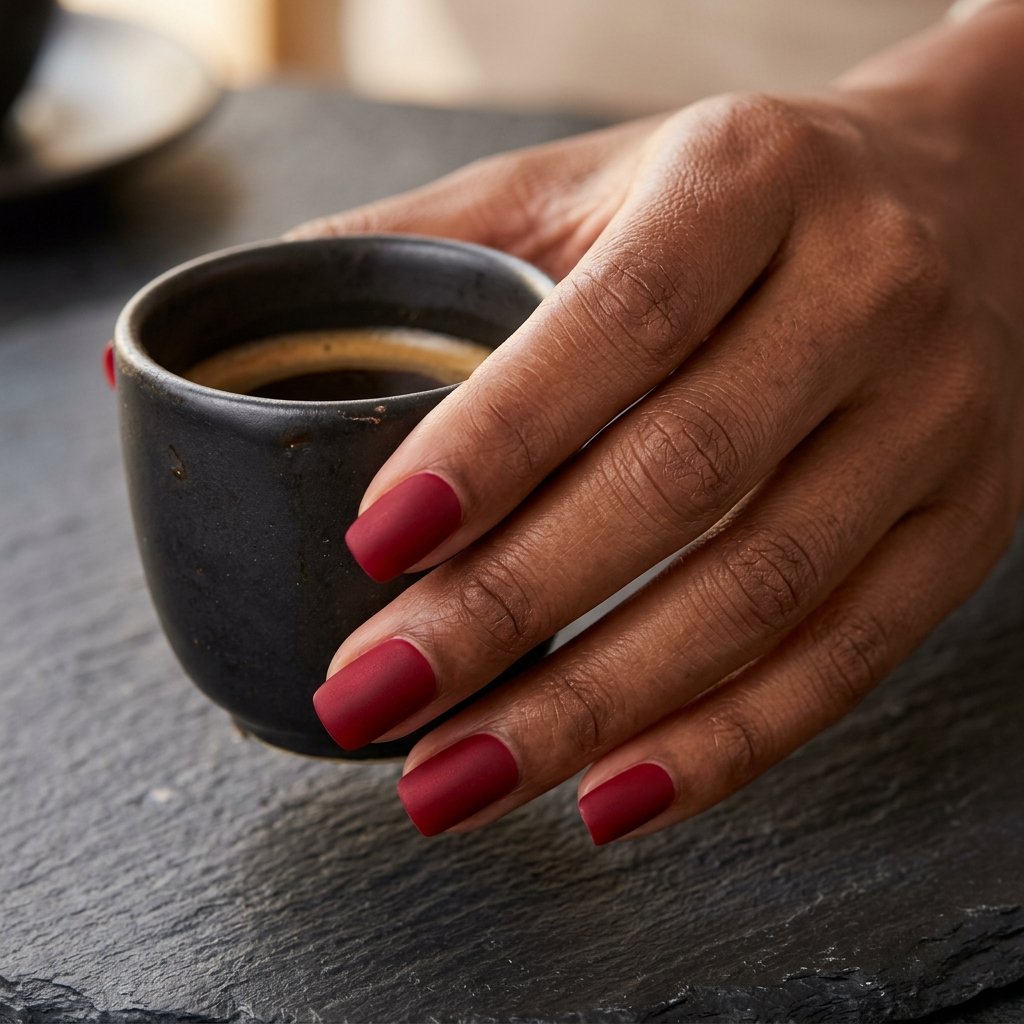
The Matte Cherry For Photos Without Flash Glare
Here’s something I wish someone had told me earlier: glossy red nails in photos often blow out. You get that white hot spot on one nail that ruins the shot. Matte cherry solves this completely.
The finish changes the entire vibe too. Same exact red reads more sophisticated, almost editorial. I reach for this when I want red without the “I’m wearing red nails!” announcement. It whispers instead of shouting.
Application matters more with matte because the top coat doesn’t hide imperfections the way gloss does. You need your base coat fully dry before color, I wait a full two minutes. Any tackiness underneath shows through as texture once the matte finish goes on.
One honest caveat: matte finishes chip faster for most people. I get maybe five days versus seven with glossy. Worth it for the look, but manage expectations.
The Product Behind The Gloss
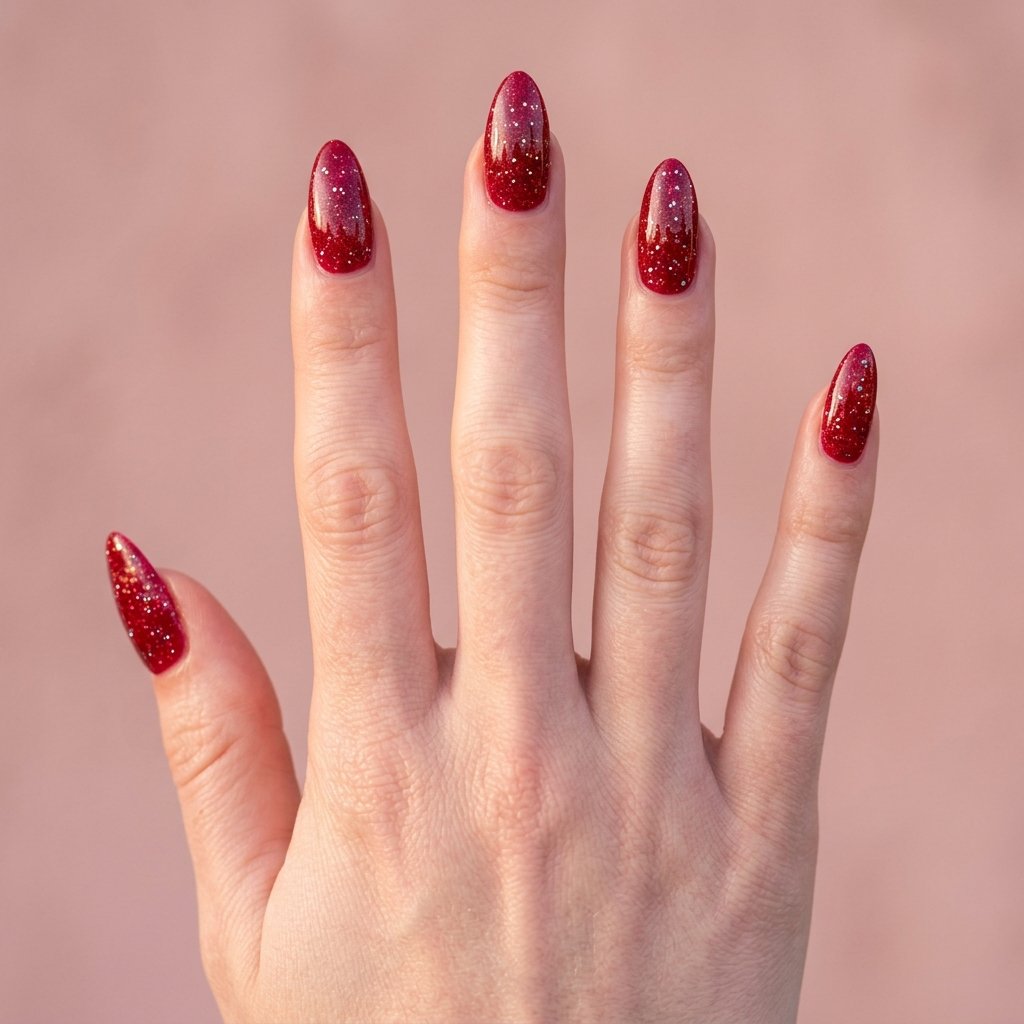
Cherry Red With Micro-Glitter For Dimension
I used to dismiss glitter red as tacky. Then I discovered micro-glitter formulas, the particles so fine they look like the nail itself is catching light from within rather than having chunky sparkles sitting on top. Completely different effect.
The application takes patience. These formulas run thick. You want two thin coats and you need to let the brush do the work without pressing hard. Pressing hard pushes glitter particles around and creates bald spots.
This look photographs incredibly well for social media. The tiny light-catching particles create visual interest that reads even in small thumbnail images. I’ve noticed my glitter red posts consistently outperform solid colors for engagement.
For removal though, be prepared. Those micro-particles grip. You’ll need acetone and foil wraps, minimum ten minutes soak time. Regular remover barely touches it.
This cherry red glitter tends to flatter neutral and cool skin tones particularly well. The sparkle seems to counteract any potential orangey pull.
The Finish That Feels Luxury
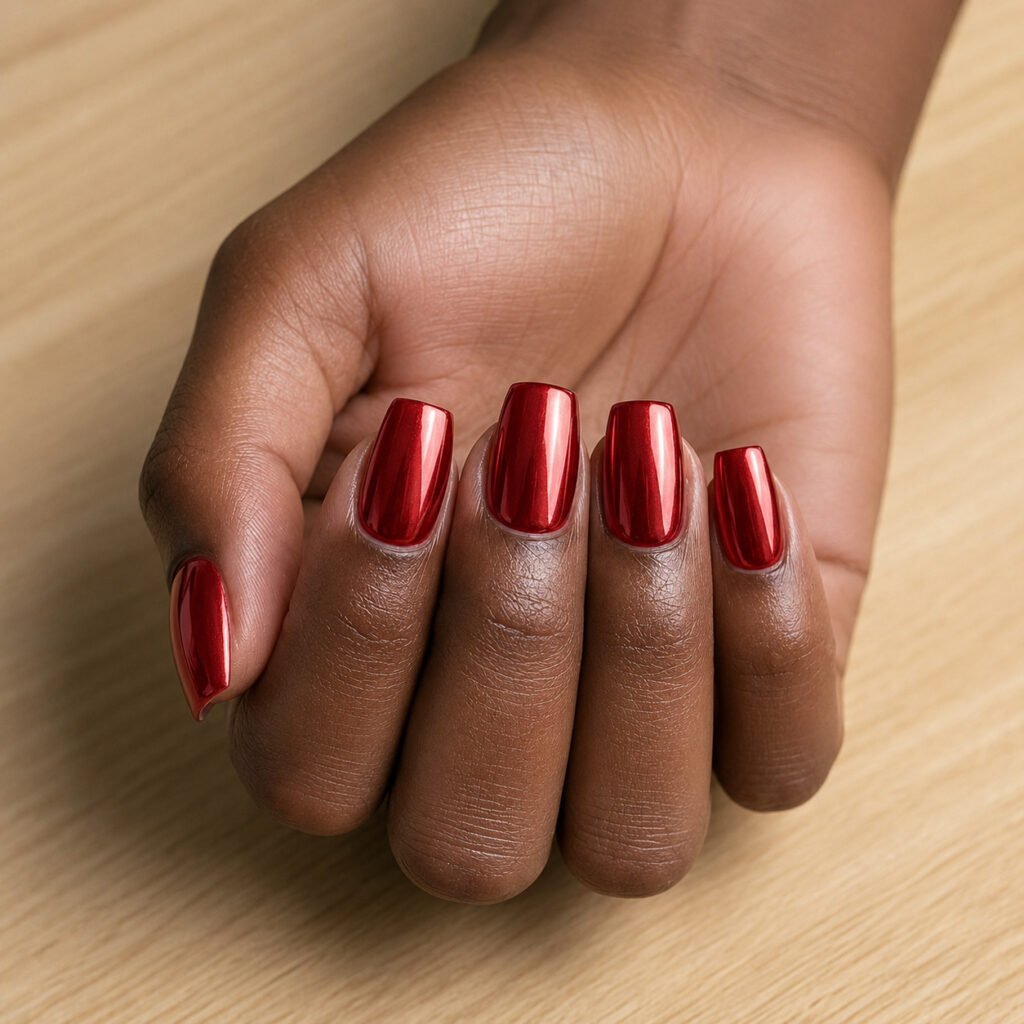
The Chrome Cherry That Elongates Short Nails
Chrome finishes have a visual trick most people don’t talk about: they elongate the nail bed. The reflective surface creates an optical illusion that makes nails look longer. For my friends with short nail beds or anyone who bites, this is the look I recommend.
The technique matters enormously here. Chrome powder over cherry red gel requires your color coat to be tacky but not wet. Too wet and the powder won’t adhere. Too dry and it won’t burnish to that mirror finish. The sweet spot is about 30 seconds after your final color coat on most lamp setups.
I use a silicone tool rather than an eyeshadow applicator. The silicone presses the powder in more evenly. Takes about 45 seconds per nail to get that true mirror effect.
One specific observation from testing: cherry chrome on deep cool undertone skin looks absolutely stunning. The contrast creates this rich jewel-tone effect that warmer skin tones don’t get quite the same way.
Amber’s Most Complimented Shade
Beetles Gel Nail Polish Cherry Red
Technique Tips That Apply Across All Four Looks
Cuticle prep makes or breaks cherry red specifically. This color family shows lifting at the cuticle line faster than pastels or nudes because the contrast is so stark. Push cuticles back and remove any dead skin the day before, not right before application. Your cuticles need to calm down.
Clean the nail plate with alcohol immediately before base coat. Any oil residue shows up as bubbles with red polish specifically. I learned this after three frustrating attempts with one particular Essie red that kept bubbling until I realized my hands had lotion residue.
For longevity, wrap the tip. Drag your brush across the very edge of each nail with every coat including top coat. This seals the color and prevents the tip peeling that cherry reds are notorious for.
Frequently Asked Questions
How many coats does cherry red nail polish need?
Three thin coats for most formulas, not two. Cherry red shows brush strokes and opacity issues with thick application. Patience with thin layers pays off in a more even finish that lasts longer and dries faster between coats.
Why does my cherry red nail polish look orange?
The red you chose likely has yellow undertones clashing with your skin’s cool undertones. Look for cherry reds specifically labeled “blue-based” or with descriptions mentioning wine or berry notes. These tend to read as true red on cooler complexions.
How do I stop cherry red from staining my nails?
Always use base coat, non-negotiable with reds. Even then, some staining happens with heavily pigmented formulas. A whitening base coat helps prevent it, and lemon juice soaks for five minutes remove light staining after removal.
Final Thoughts
Cherry red nails remain one of the most requested looks for a reason, the color reads bold and put-together without requiring complicated nail art skills. Whether you go glossy classic, matte sophisticated, glittery dimensional, or chrome reflective, the key sits in your application patience and understanding which finish flatters your specific situation.
I’d genuinely love to know: which of these four cherry red looks are you trying first?
Hi, I’m Amber, the creator behind Dazzle Me Nails. I started this site because I’ve always believed nails aren’t just about beauty, they’re about confidence, self expression, and feeling put together in the simplest way. Like many of you, I’ve struggled with weak nails, chipped polish, and designs that looked good online but didn’t work in real life. That’s why I created Dazzle Me Nails to share nail ideas that are practical, wearable, and easy to recreate.
Here, you’ll find minimalist nail designs, trend inspired looks, and simple nail care tips to help you achieve clean, polished nails without over complicating your routine. If you love soft, classy, and effortless nail styles, you’re in the right place.