")
I spent two months getting bow nails to peel off within 48 hours. The little 3D bows would pop right off in the shower, leaving bare spots that looked worse than if I had just skipped the embellishment entirely. After ruining six manicures and wasting probably $40 in nail charms, I finally figured out what I was doing wrong. Turns out the placement of bow nails matters more than the glue.
Bow nails are everywhere right now. TikTok. Pinterest. Every salon menu. But most tutorials skip the part about why they fail. I tested different attachment methods across three nail shapes over the past season, and these four looks held up through dishes, gym sessions, and one very aggressive luggage zipper incident.
What Makes Bow Nails Actually Work
These four looks share one thing: strategic bow placement. I stopped putting bows dead center on every nail. That is where they catch on everything and leverage themselves off.
The looks below range from soft coquette to holiday glam. Some use 3D charms. Others use hand-painted bows that cannot snag. I will be honest about which ones require more skill and which ones a total beginner can pull off after work on a Tuesday night. Not every bow nail needs to be complicated.
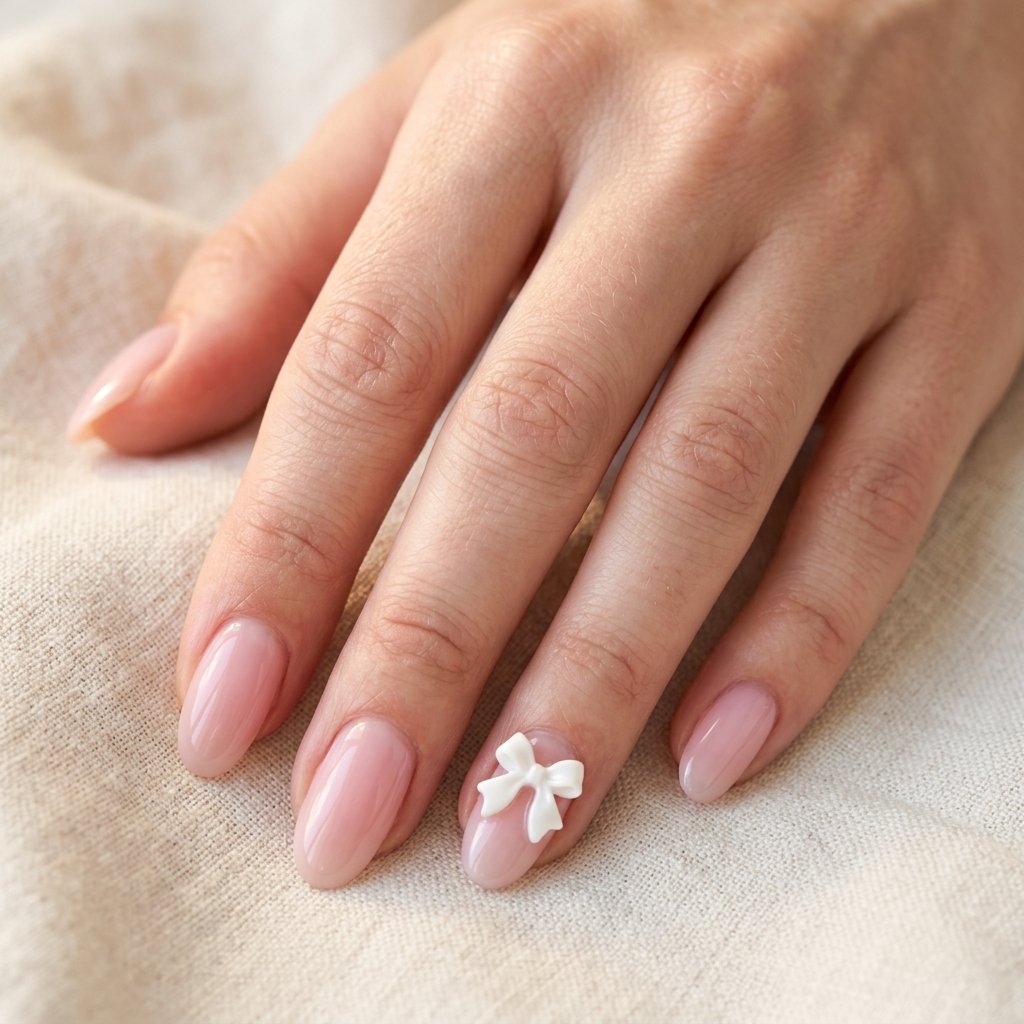
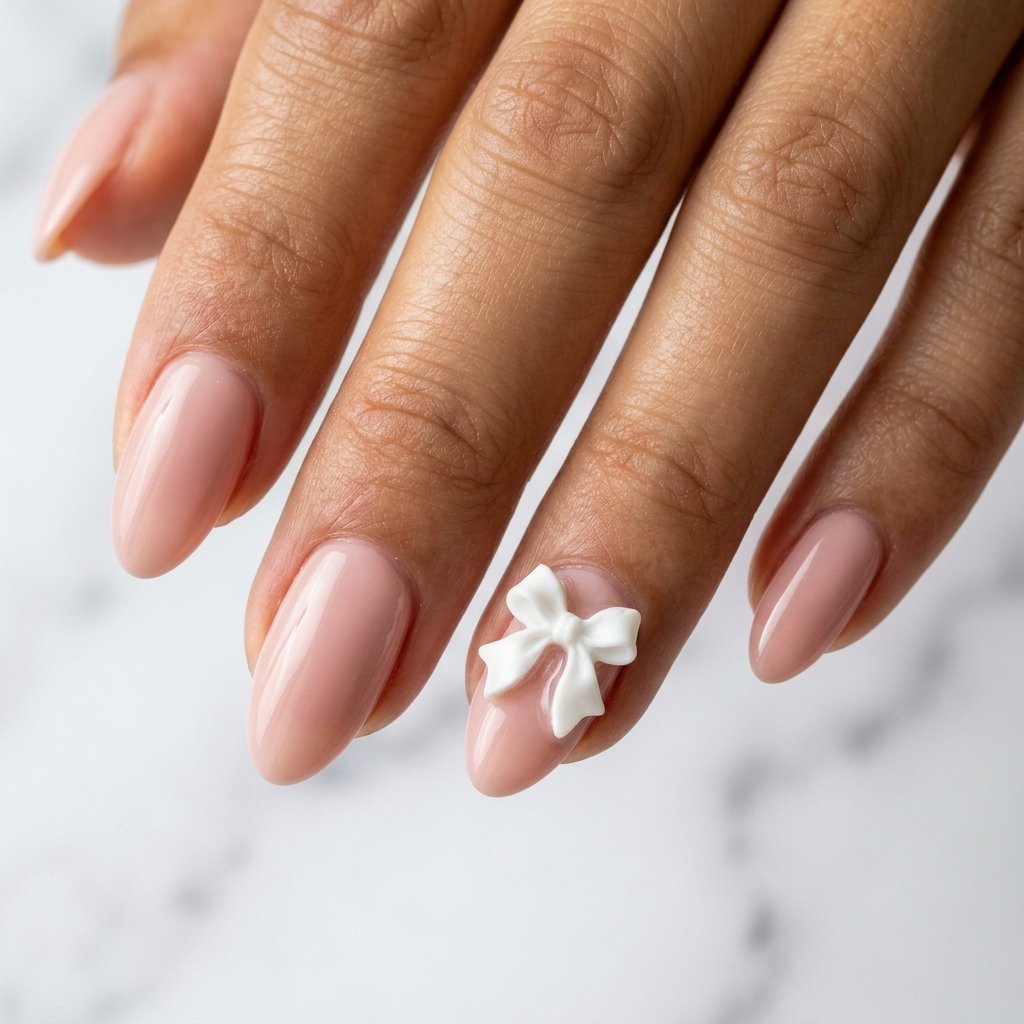
The Milky Pink Coquette Look, Best for Oval and Almond Shapes
This is the bow nail that started my obsession. Soft milky pink base. One delicate white 3D bow on the ring finger only. Clean and feminine without looking like you are trying too hard.
The trick here is bow size. Anything wider than your nail bed will catch on pockets and hair. I measure the bow against my nail before purchasing. It should leave at least 2mm of visible nail on each side. For this look, I use a rubber base coat underneath, not regular base, because it creates a slightly tacky surface that grips the charm better.
Paint the milky pink in two thin coats. Let each coat cure properly. Not almost cured. Actually cured. I wait the full 60 seconds even though my lamp claims 30 is enough. Then I place a tiny dot of brush-on nail glue where I want the bow, slightly above center, closer to the cuticle than the tip. Press the bow down for 15 seconds. Seal the edges with a thin gel top coat, but leave the top of the bow exposed so it keeps that satin texture.
What I Actually Use
Beetles Gel Polish Set 6 Colors Milky White Nude Pink Collection
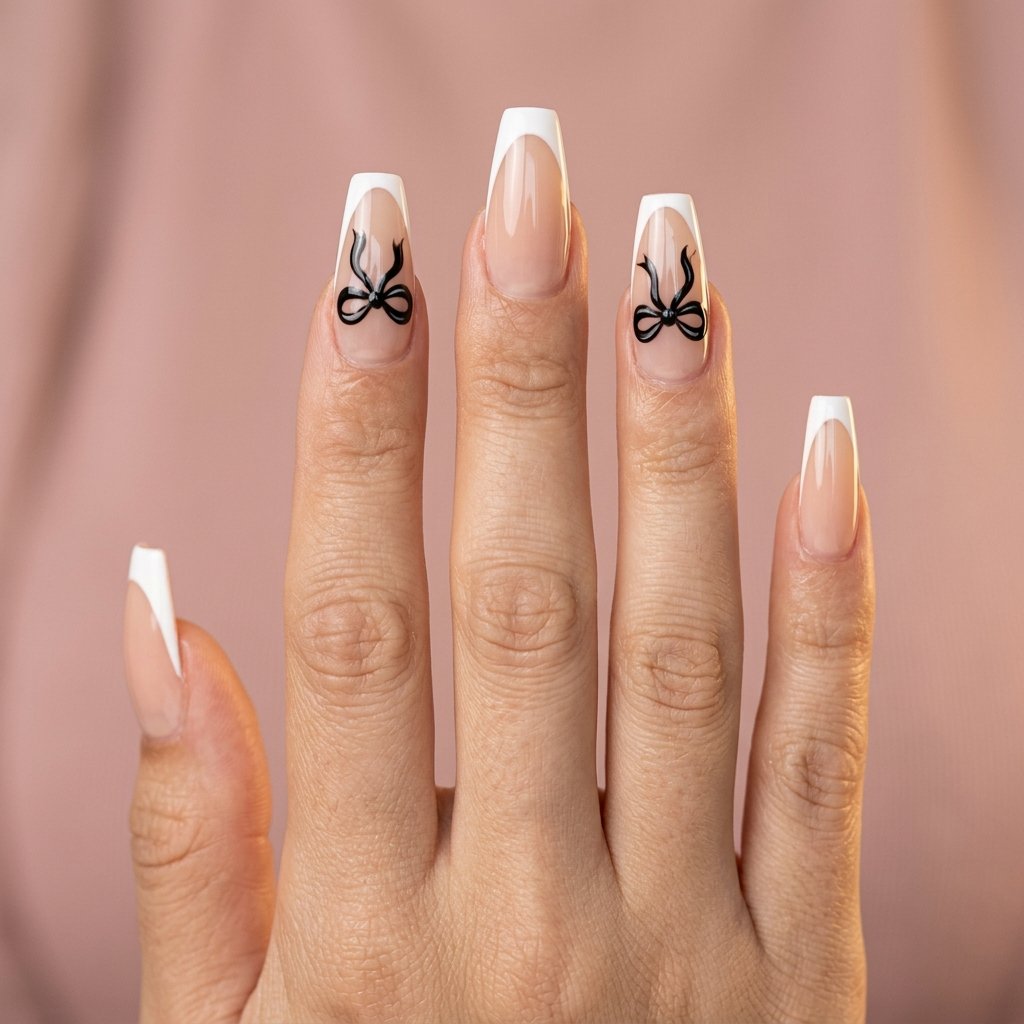
Hand-Painted Ribbon Bows, The Flat Option That Never Snags
If you hate 3D charms catching on sweaters, this is your bow nail. Painted bows sit flush against the nail surface. Zero snag risk. They look more delicate than 3D options, almost like vintage ribbon illustrations.
I will not lie, this takes a steady hand. But the technique is more forgiving than it looks. You are basically painting two loops and two tails. Start with your base color, cure it, then use a thin liner brush dipped in a contrasting gel polish. I like black bows on French tips or white bows on nude.
For the loops: paint two small teardrop shapes angled toward each other, meeting at a point in the middle. Add a small circle or dot where they meet. Then two diagonal lines downward for the ribbon tails. The whole bow should be about 4mm wide on a standard nail. Cure between elements if your hands shake, nobody will know you did it in stages.
This look tends to work better on longer nails because you have more canvas. On short nails, the bow can overwhelm the whole nail bed and look crowded.
The Exact Brush
Beetles Nail Art Brushes Set Liner Brush Detail Brush for Nail Design
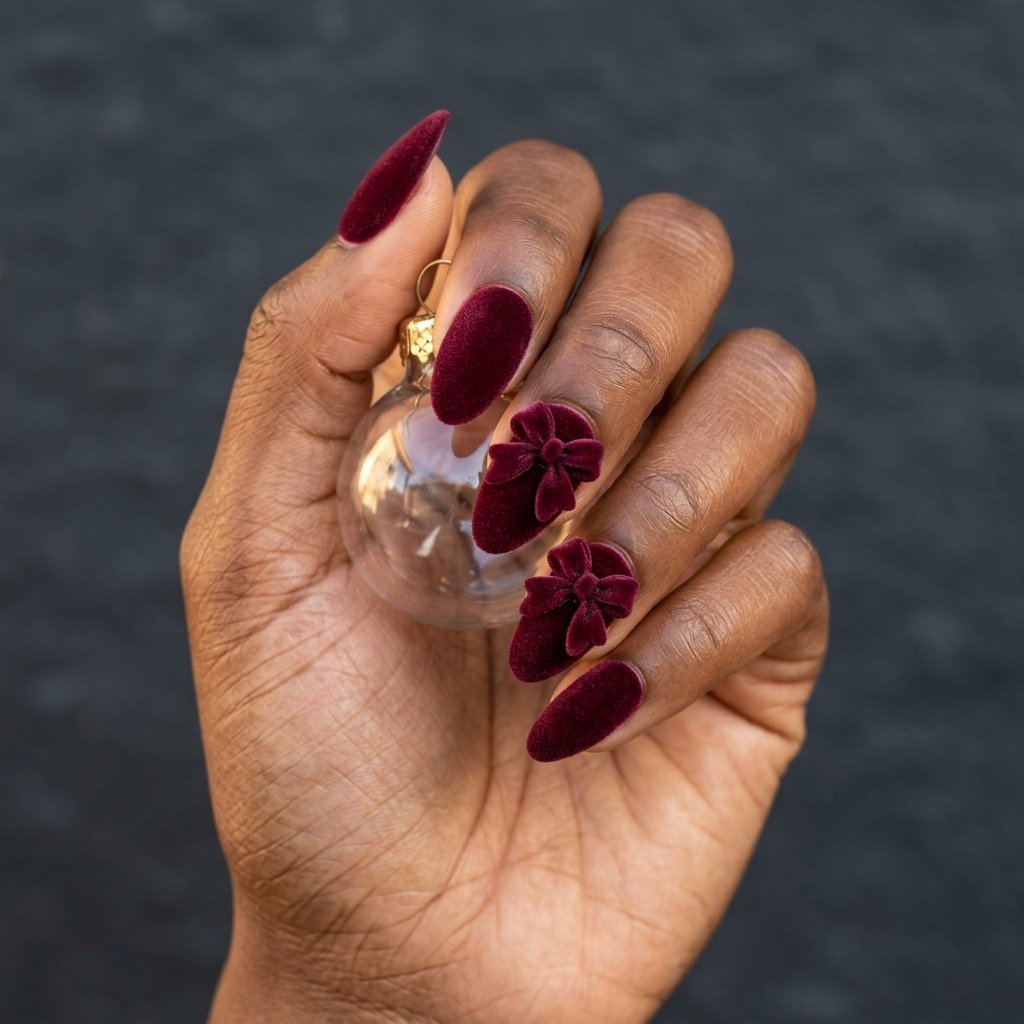
Velvet Bow Nails for Winter, The Texture That Photographs Beautifully
I discovered velvet bow nails last December when regular glossy bows started looking too shiny for holiday photos. The matte flocked finish absorbs light instead of reflecting it, which reads as more expensive in pictures. Trust me on this.
You need actual velvet flocking powder for this. Regular matte top coat will not give you the same depth. Here is how I do it: paint your base color and cure. Apply another thin layer of the same color but do not cure yet. While it is still tacky, use a fluffy eyeshadow brush to press velvet powder into the wet gel. Be generous. Tap off the excess, then cure. The powder bonds into the gel and creates that soft fabric texture.
For the bows, I use self-adhesive velvet ribbon bow charms. They come pre-made with flocking already on them. I add a tiny drop of gel glue underneath anyway because the adhesive backing alone usually fails after three days. The velvet-on-velvet texture looks cohesive, like you planned it.
This look does show wear faster than glossy versions. The flocking can flatten in high-touch areas. I get about 8 days of pristine wear versus 12 to 14 for regular gel.
Worth Every Penny
Born Pretty Nail Velvet Flocking Powder Manicure Nail Art
Clear Jelly Bows on Glass Nails, The Beginner-Friendly Version
Okay. This is the bow nail I recommend to everyone who has never done nail art before.
Glass nails, that transparent jelly look, forgive basically every mistake. Bubbles blend in. Uneven edges disappear. And clear 3D bows on clear nails create this subtle dimensional effect that looks expensive without any actual skill.
I use a sheer pink or nude jelly builder gel as the base. Three coats for opacity, though some people like it sheerer. For the bows, I order clear acrylic charms, the kind that look like they are made from actual glass. They come in packs of 50 for practically nothing.
Attachment is the same as the milky pink look: dot of brush-on glue slightly above center, press, hold 15 seconds. But here is where this look gets forgiving, you seal the entire charm under a thick gel top coat. No exposed bow surface. The gel encases everything like resin, which means zero snagging and the bow literally cannot fall off unless you file through the top coat.
I have tested this on my mom, who types for 8 hours a day. Her bows lasted 16 days.
Amber’s Pick
Modelones Builder Gel Nail Kit 6 Colors Clear Pink Nude
Why Most Bow Nails Fail (And How to Prevent It)
Placement. Always placement.
Most people stick bows at the exact center of the nail. This puts the charm right where your fingertip contacts surfaces, door handles, keyboards, zippers. Every touch point becomes a lever that pries the bow upward.
Move the bow toward the cuticle area. Not at the cuticle, you need 3mm of clear space to avoid lifting. But above center, where your finger pad curves away from contact. My bow retention improved from 48 hours to 12 days just by changing where I position them.
The second mistake: using too much glue. A thick glob of adhesive creates an uneven base that rocks when pressed. One tiny dot, about the size of a pinhead, distributes pressure evenly. More glue is not more security.
Third: skipping the seal. Even when your bow sits perfectly, sealing the edges with a thin layer of gel top coat prevents moisture and oils from weakening the bond underneath. Do not coat the entire bow unless you want it encased. Just paint around the base where it meets the nail.
Frequently Asked Questions
Do bow nails work on short nails?
They can. Flat painted bows or very small 3D charms work best. Anything larger than 5mm tends to overwhelm a short nail bed and look costume-y. The clear jelly look I mentioned above is especially forgiving for shorter lengths.
How long do 3D bow charms last on gel nails?
With proper placement above center and edge sealing, I generally get 10-14 days before any lifting. Fully encased bows under thick top coat can last the full wear of the manicure, around 2 to 3 weeks for most people.
Can I do bow nails with regular polish instead of gel?
Yes, but expect shorter wear. Regular polish does not create the same tacky cure surface for glue adhesion. I would recommend press-on nails with bows already attached if you want the look without gel equipment.
Your Next Bow Nail Experiment
Bow nails are not as fragile as most tutorials make them seem. The difference between a bow that falls off in the shower and one that survives two weeks of real life usually comes down to placement and sealing.
Which look are you trying first, the velvet texture or the beginner-friendly jelly version? I am genuinely curious because the velvet gets more saves on Pinterest but the jelly bows get more actual questions in my DMs.
Hi, I’m Amber, the creator behind Dazzle Me Nails. I started this site because I’ve always believed nails aren’t just about beauty, they’re about confidence, self expression, and feeling put together in the simplest way. Like many of you, I’ve struggled with weak nails, chipped polish, and designs that looked good online but didn’t work in real life. That’s why I created Dazzle Me Nails to share nail ideas that are practical, wearable, and easy to recreate.
Here, you’ll find minimalist nail designs, trend inspired looks, and simple nail care tips to help you achieve clean, polished nails without over complicating your routine. If you love soft, classy, and effortless nail styles, you’re in the right place.